Blog

  • How to Stop Roof Vent Leaks Without a New Roof

    How to Stop Roof Vent Leaks Without a New Roof

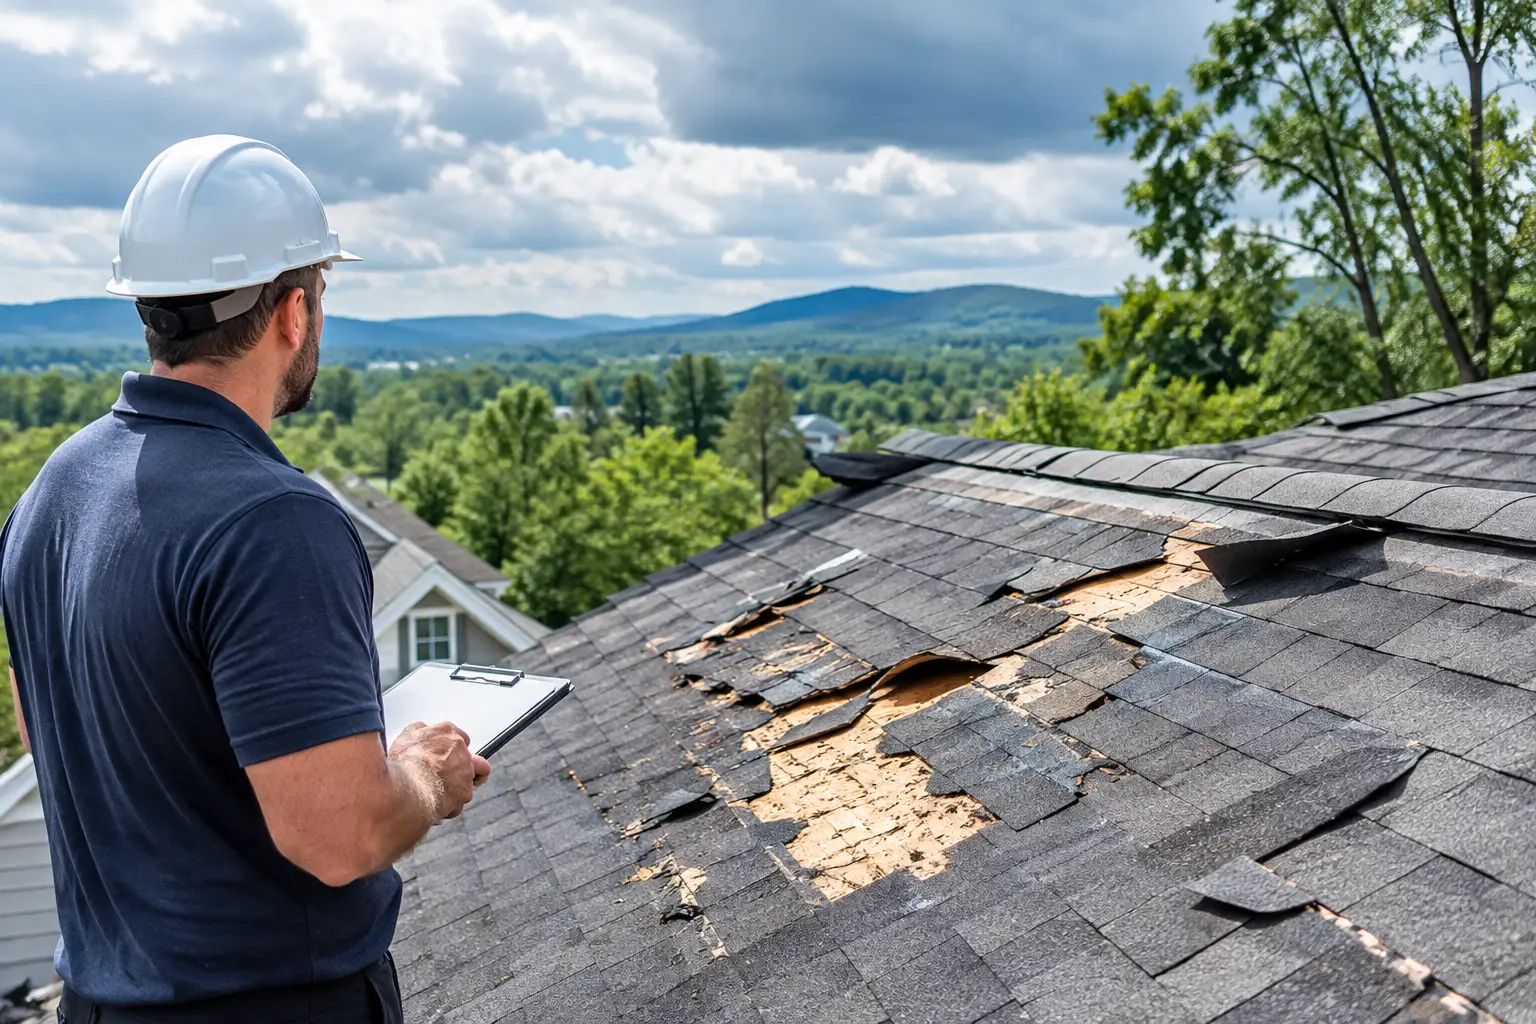
    A roof vent leak can leave a brown ceiling stain far from the actual problem. Water may run along roof decking, rafters, insulation, or a bath fan duct before it finally drips where you can see it. That is why the fastest way to stop roof vent leaks is not to throw caulk at the stain. Find out whether the vent flashing, the vent itself, nearby shingles, or attic condensation is letting water in.

    For homes, cabins, rentals, and commercial properties around the Red River Gorge, vent leaks are common after hard rain, wind-driven storms, ice, and long stretches of wet leaves sitting on a roof. The good news is that many are repairable without replacing the whole roof. The bad news is that a small leak around a vent can quietly rot the decking and framing if it is ignored.

    Why roof vents start leaking

    Most roof vents do not leak because the opening in the roof is automatically a weak point. They leak when the layers that shed water around that opening stop doing their job. On a shingle roof, the metal or plastic flashing at the base of the vent should tuck under shingles above it and sit over shingles below it. That overlap is what sends rain downhill and away from the roof deck.

    Age, wind, sun, and poor past repairs can break that system down. The rubber collar around a plumbing vent pipe can crack. Nail heads can back out or rust. Plastic box vents can split. Metal flashing can bend or corrode. A previous repair may have buried the flashing edge in roof cement, which can hold water and make the next repair harder.

    Cabins often have another issue: tree debris. Valleys full of leaves are how cabin roofs die, and the same buildup around a vent can trap moisture against shingles and flashing. When water cannot move off the roof, it finds the smallest opening available.

    First, confirm it is actually a roof vent leak

    Before repairing anything, narrow down the source. A wet ceiling near a bathroom does not always mean rain is coming around the plumbing vent. It could be condensation from an uninsulated bath fan duct, a disconnected duct in the attic, or a plumbing leak.

    Watch when the problem appears. If the stain grows after a steady rain or a wind-driven storm, suspect the roof surface or flashing. If it happens during cold weather when showers are running, inspect the bath fan duct. Warm, humid air hitting cold attic surfaces can create enough moisture to soak insulation and stain a ceiling.

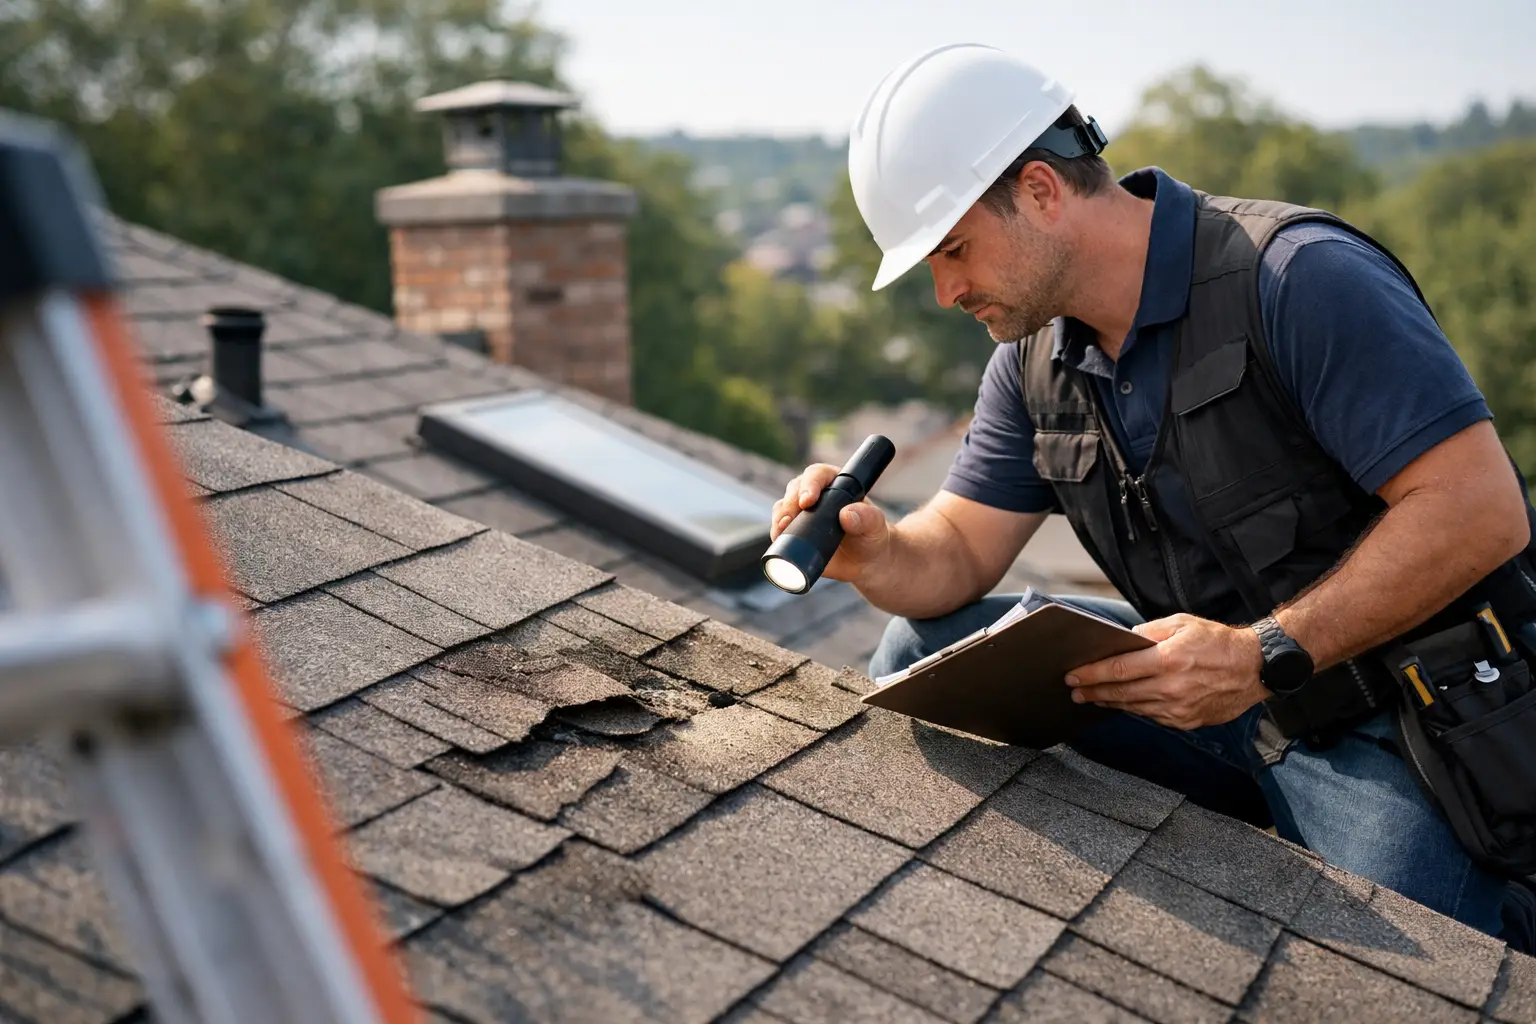
    From inside the attic, look for dark wood, wet insulation, rusted nails, water tracks, or daylight around the vent opening. Use a flashlight and inspect during or soon after rain when possible. Do not step on the drywall ceiling, and do not disturb wet electrical wiring. If you can see water but cannot tell where it begins, the leak may be higher up the roof than the vent itself.

    Outside, look for cracked vent housings, lifted shingles, exposed fasteners, gaps at the flashing edge, and piles of leaves or pine needles. On metal roofs, check the fasteners and sealing washers around pipe boots and vent curbs. A washer that has dried out, split, or loosened can let water through with every storm.

    How to stop roof vent leaks the right way

    A lasting repair starts with removing the failed material, not covering it up. Roof cement and silicone have a place as a small finishing detail, but they should not be the main thing keeping water out. If a vent has been sealed over and over, the repair often needs to be opened up so the flashing can work correctly again.

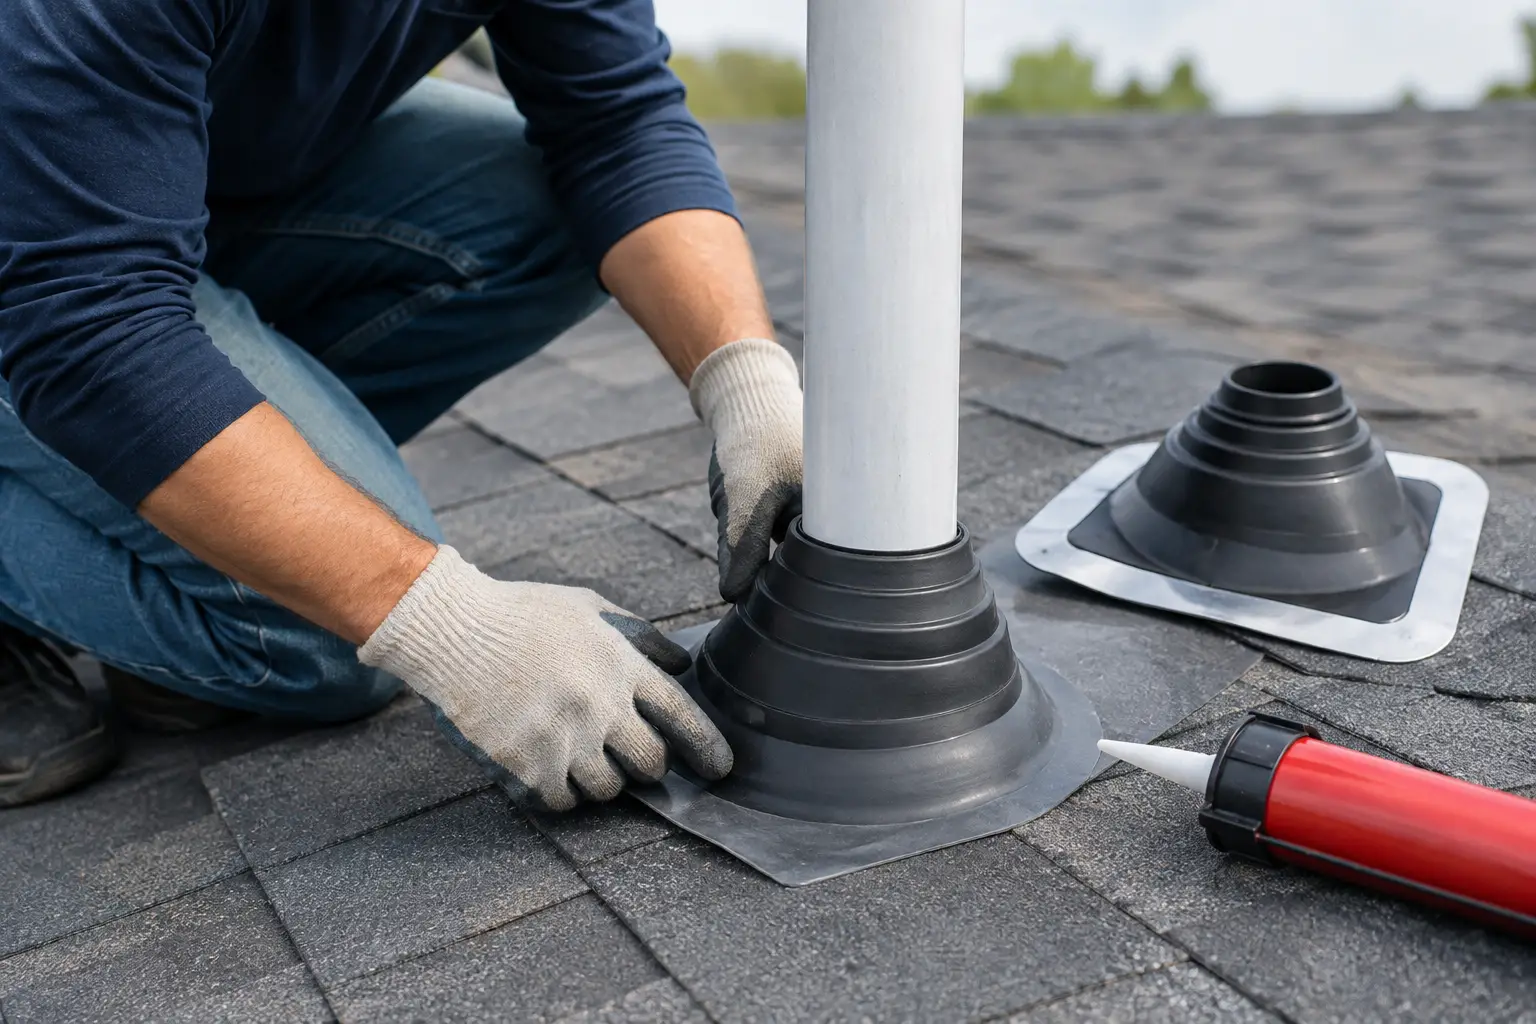
    Replace cracked pipe boots

    Plumbing vents are one of the most common trouble spots. The rubber or neoprene collar around the pipe is exposed to sun all day and eventually cracks. Once it splits, rain follows the pipe straight into the attic.

    Replacing a pipe boot usually requires carefully lifting the shingles around it, removing old nails, sliding in the new flashing, and reinstalling shingles so water sheds in the correct direction. The pipe boot must fit the pipe diameter, roof pitch, and roof material. A boot that looks close enough but does not sit flat will cause another leak.

    On older roofs, shingles around the boot may be brittle. That is where a simple repair can turn into a larger patch if handled roughly. It still may be far less expensive than a full replacement, but it depends on the condition of the surrounding shingles and roof decking.

    Reset or replace box vents and ridge vents

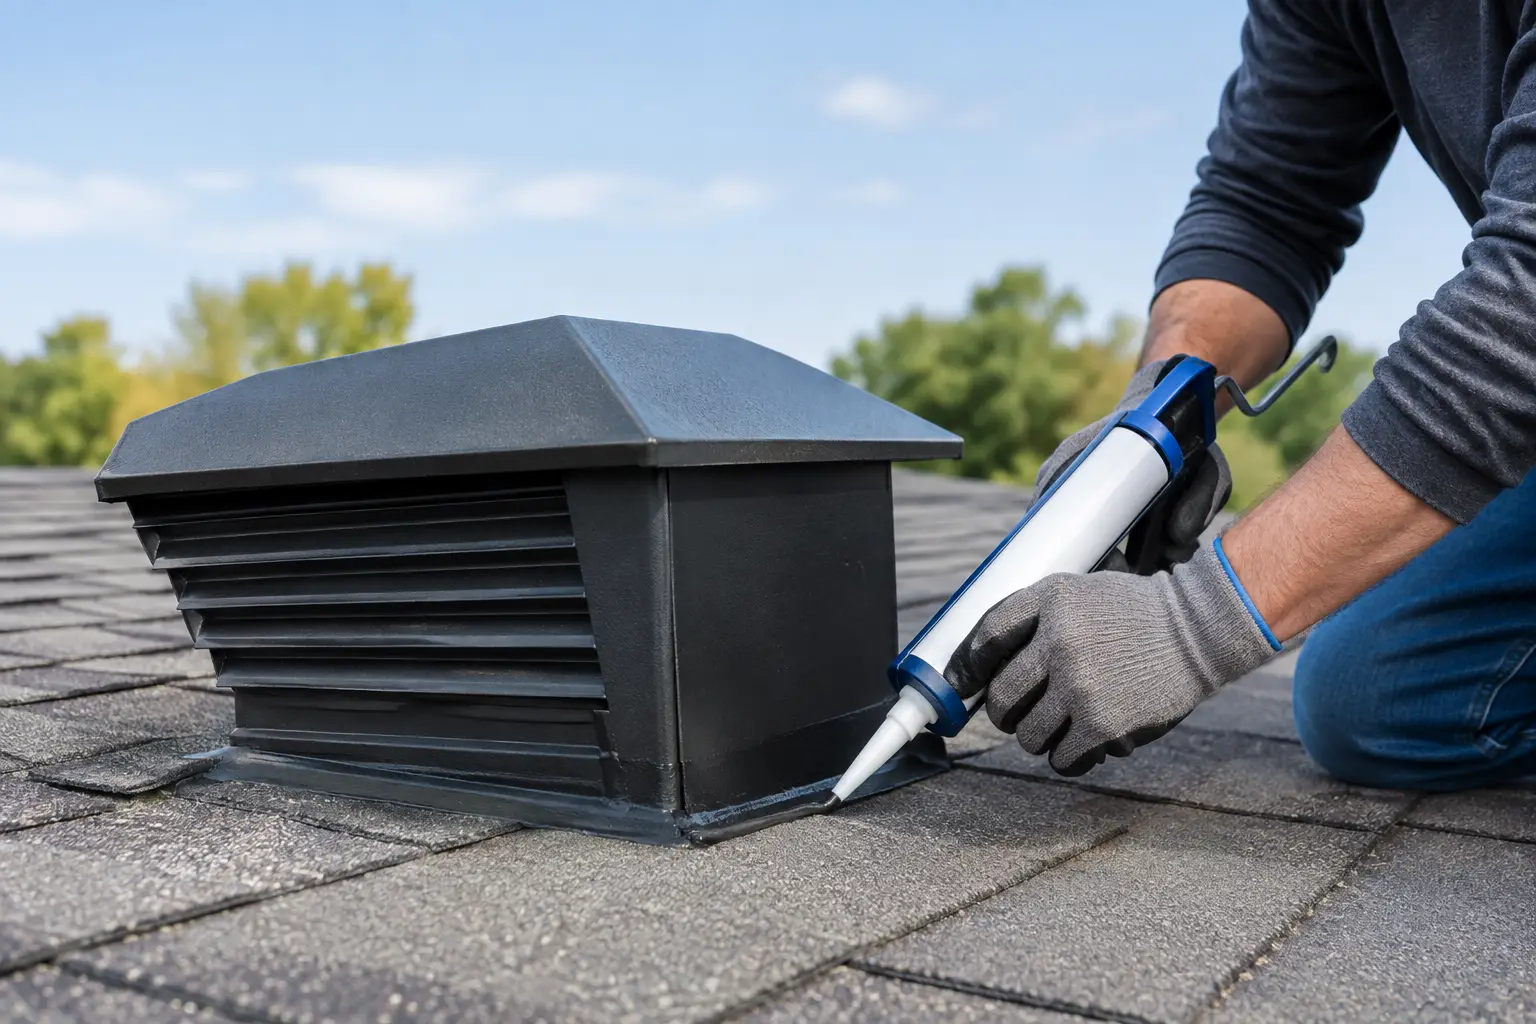
    Static box vents and turbine vents can leak at their nail locations, at cracked corners, or where the flange is no longer properly lapped under the shingles. The fix may be as straightforward as resetting the vent with new flashing details and replacing damaged shingles. If the vent body is cracked or warped, replacement is the better call.

    Ridge vents need a different inspection. Wind can loosen ridge cap shingles, and missing fasteners can create openings along the ridge. A ridge vent should allow attic air to escape while keeping rain out. If wind-driven rain is entering, check for missing end plugs, damaged cap shingles, or a vent product that was not installed for the roof’s pitch and local weather exposure.

    Check nearby shingles, valleys, and penetrations

    Do not let a vent get blamed for every leak in its area. Water can enter several feet uphill, especially on a low-slope roof or during a heavy Kentucky downpour. A cracked shingle, failing nail seal, open valley, loose ridge cap, or damaged chimney flashing may send water toward the vent opening before it appears inside.

    This matters because sealing the visible vent without fixing the uphill defect only buys time. A proper diagnosis follows the water path, checks the roof surface above the leak, and looks beneath the shingles where necessary.

    When the repair needs more than flashing

    If the roof deck feels soft around a vent, the wood under the shingles may already be damaged. That does not automatically mean the entire roof needs replacement. Often, a focused repair can remove a small section of rotten decking, replace the damaged wood, install new underlayment, and rebuild the vent flashing correctly.

    The decision comes down to how far the damage has spread. Localized rot around one pipe boot is a repair. Widespread soft decking, multiple failing vents, brittle shingles throughout the roof, or leaks in several unrelated areas may point to a bigger project. Get a straight answer based on what is actually there, not a sales pitch built around the biggest possible job.

    For remote cabin owners and short-term rental hosts, documentation matters just as much as the repair. Ask for photos of the damaged flashing, the condition of the decking if it is exposed, and the completed repair. Before-and-after photos make it easier to understand what was fixed when you are hours away and help create a maintenance record for the property.

    Keep the next roof vent leak from starting

    A quick roof check after major storms can catch lifted shingles and damaged vent caps before the next rain. Clean leaves and branches off the roof carefully, especially near valleys, chimney crickets, and vent openings. Keep gutters flowing too. Overflowing gutters can wet fascia, soffits, and roof edges until the damage starts traveling inward.

    Inside the attic, make sure bath fan ducts are connected, insulated where needed, and vented outdoors rather than into the attic. Check that insulation is not blocking soffit intake vents. Attic ventilation will not repair bad flashing, but it can reduce moisture buildup and help your roof materials last longer.

    If a ceiling stain appears after a storm, put a container under any active drip, move valuables out of the area, and call for a roof inspection before the next round of rain. Central Property Services can identify the source, make a repair-first recommendation, and document the work so you know what was done.

    A roof vent leak is usually small only at the beginning. Catch it while the repair is still about flashing and shingles, not wet insulation, rotten decking, and a ceiling that has to come down.

  • Does a Re-Roof Need a Permit in Central Kentucky?

    Kentucky has a mandatory statewide residential building code, and it applies to the roof on your house. It also says, in the same regulation, that permits and inspections are not required for a single-family dwelling unless a local ordinance requires them. Both of those things are true at once, and the gap between them is where most homeowner confusion about re-roof permits lives.

    Does Kentucky require a permit to replace a roof on a house?

    Not at the state level. 815 KAR 7:125 provides that permits, inspections and certificates of occupancy are not required for a single-family dwelling unless required by local ordinance.

    That is an exception written into the residential code itself, not a loophole. The same regulation makes the residential code mandatory for all single-family dwellings, two-family dwellings and townhouses built in Kentucky. So the construction standard is statewide and compulsory; the enforcement mechanism — whether anybody pulls a permit and comes to look — is a local decision made by your city or county.

    Which means the honest answer to “do I need a permit for my re-roof?” is: ask the jurisdiction the house actually sits in. Richmond, Berea, and unincorporated Madison County are not obliged to answer that question the same way, and a contractor who tells you “Kentucky doesn’t require one” has answered only half of it.

    No permit required does not mean no code required. The standard applies whether or not anyone shows up to check it.

    Which code book is actually in force right now?

    The 2015 International Residential Code, as amended by the 2018 Kentucky Residential Code. The current incorporation is the Third Edition of the Kentucky Residential Code, dated August 2024.

    815 KAR 7:125 incorporates both documents by reference and states that the Kentucky amendments supersede any conflicting provision in the 2015 IRC. The regulation’s own history line records the most recent version as effective 3 December 2024, filed with the Legislative Research Commission on 13 August 2024. The material is held at the Department of Housing, Buildings and Construction in Frankfort.

    Two details in that sentence matter on a real job. First, the edition year of the base IRC and the edition year of the Kentucky amendments are different numbers — 2015 and 2018 — and quoting one without the other is how people end up citing a provision Kentucky changed. Second, the Kentucky amendment document was revised as recently as last year, so a detail a roofer learned a decade ago is not automatically current.

    What if the building is not a single-family house?

    Then the exception does not apply to it, and a different code book does. Residential occupancies that are not single-family dwellings, two-family dwellings or townhouses fall under the 2015 International Building Code and the 2018 Kentucky Building Code.

    That line is written directly into 815 KAR 7:125 as its second exception, and it is the state-level version of a boundary we have looked at from the local side before: Lexington’s own published code list draws the same division at two families, which is the subject of which rulebook your re-roof answers to. A triplex, an apartment building, a church or a commercial roof is on the other side of that line, and the permit-exception for single-family dwellings does not reach it.

    BuildingGoverning codeState permit exception?
    Single-family dwelling2015 IRC + 2018 Kentucky Residential CodeYes — unless local ordinance requires one
    Two-family dwelling / townhouse2015 IRC + 2018 Kentucky Residential CodeException is written for single-family dwellings
    Three or more units, commercial2015 IBC + 2018 Kentucky Building CodeNo

    How do you find out what your own jurisdiction requires?

    Ask the office that issues building permits where the property sits, and ask it before the tear-off rather than after. In Madison County the county publishes a Planning and Development department with building permit applications through its official site.

    The Madison County Planning and Development page is where the county’s permit applications are published. Inside a city’s limits the answer may come from the city rather than the county, which is why “Madison County” and “Richmond” are not interchangeable when you are asking this question. Two practical notes: a permit requirement can attach to work that is not a full replacement, and a homeowner’s insurance claim or a future buyer’s inspection may ask for permit records regardless of whether the jurisdiction required one at the time.

    What this means for how we work

    The useful habit is to treat the permit question and the code question as two separate questions, asked in that order. Whether a permit is required is local and answerable with a phone call. Whether the work meets the residential code is statewide, mandatory, and not contingent on anyone inspecting it — which is exactly why it is worth caring about on jobs where nobody will.

    Where a permit is required, pulling it is the contractor’s normal part of the job and belongs in the written scope. Where one is not, the specification still belongs in writing — underlayment, fastening, flashing, ventilation — because that document is the only record that the mandatory standard was met. The same logic applies to reading a roofing estimate: what is written down is what can be verified later.

    Common questions

    If no permit is required, does the code still apply to my roof?

    Yes. 815 KAR 7:125 makes the residential code mandatory for single-family dwellings built in Kentucky. The permit exception in the same regulation removes the permitting and inspection requirement at state level; it does not remove the construction standard.

    Which edition of the code is in force?

    The 2015 International Residential Code together with the 2018 Kentucky Residential Code, Third Edition, August 2024, incorporated by reference in 815 KAR 7:125. The Kentucky amendments supersede any conflicting provision of the 2015 IRC.

    Does the exception cover a duplex?

    The exception in 815 KAR 7:125 is written for a single-family dwelling. Two-family dwellings and townhouses are governed by the same residential code, but the permit question for them should be confirmed with the local permitting office rather than assumed.

    Code provisions above are quoted from 815 KAR 7:125, Kentucky Residential Code, as published by the Kentucky Legislative Research Commission and retrieved 23 September 2026. Local requirements vary; confirm with the permitting office with jurisdiction over the property. Last updated 23 September 2026.

    By Marcos Gil, REALTOR® — Keller Williams Commonwealth · KY Real Estate License No. 296259 · Call or text (859) 310-1209.

  • The Clock Your Insurer Is On After a Kentucky Roof Claim

    After a Kentucky roof claim, your insurer is on a clock — and the clock is written down. 806 KAR 12:095 is the Kentucky regulation that sets out unfair claims settlement practices for property and casualty insurance, and it puts specific day counts on acknowledging a claim, replying to you, deciding it, and paying it. Most homeowners never see the numbers. They are short, they are public, and knowing them changes how a storm claim feels.

    How fast does a Kentucky insurer have to acknowledge a roof claim?

    Fifteen days. Under 806 KAR 12:095 Section 5(1), every insurer must acknowledge receipt of a claim notice within fifteen days unless payment is made in that period.

    Two details in that same subsection are worth keeping. If the acknowledgement is not in writing, “an appropriate notation of the acknowledgement shall be made in the claim file of the insurer and dated” — so there is meant to be a record even of a phone call. And “notification given to an agent of an insurer shall be notification to the insurer,” which means telling your local agent starts the clock.

    Section 5(3) adds a second fifteen-day duty: the insurer “shall make an appropriate reply within fifteen (15) days on all other pertinent communications from a claimant which reasonably suggest that a response is expected.” Section 5(4) requires the insurer to promptly provide the claim forms, instructions and reasonable assistance you need to meet the policy’s conditions — and doing that within fifteen days counts as satisfying the acknowledgement duty.

    What are the deadlines to decide and pay?

    Thirty calendar days from proof of loss to offer payment, and thirty days from affirming liability to tender it. If the investigation drags, the insurer owes you a written explanation every forty-five days.

    What has to happenDeadlineWhere it says so
    Acknowledge the claim15 days from noticeSection 5(1)
    Reply to your communications15 daysSection 5(3)
    Provide forms and assistancePromptly; within 15 days satisfies 5(1)Section 5(4)
    Offer any payment due30 calendar days from receipt of proof of lossSection 6(1)(a)
    Tell you more time is needed, with reasons30 calendar days after receipt of proofs of lossSection 6(1)(c)
    Update you while the investigation is open45 calendar days from initial notification, then every 45 daysSection 6(1)(d)
    Tender payment after affirming liability30 days, if the amount is determined and not in disputeSection 6(5)

    Sections 5 and 6 are captioned as applying to all insurers. Sections further down the regulation deal specifically with motor vehicle claims — those rules are not about your roof, and it is worth knowing the difference before you quote one at an adjuster.

    Every deadline in the regulation starts from a document. Which is why the dates on your photos matter more than the photos.

    Two provisions homeowners almost never hear about

    Section 4 restricts two moves that catch people out: denying a claim because the property was not exhibited, and settling partially with a release printed on the cheque.

    Section 4(2) states that insurers “shall not deny a claim on the basis of failure to exhibit property unless there is documentation in the claim file of breach of the policy provisions.” Section 4(3) similarly bars denial based on a first-party claimant’s failure to give written notice of loss within a specified time limit “unless written notice of loss is a written condition” of the policy.

    And Section 4(5) is the one to read twice: “Insurers shall not issue checks or drafts in partial settlement of a loss or claim under a specific coverage which contain language which releases the insurer or its insured from total liability.” If a partial payment arrives with release language on it, that is a thing the regulation addresses. Read what you are endorsing.

    What is in the claim file, and for how long?

    More than most people assume, and for six years. Section 3 requires insurers to keep claim data accessible and retrievable for examination by the commissioner.

    Under Section 3(1) an insurer must be able to produce the claim number, line of coverage, date of loss, date of payment, and date of denial or date closed without payment — “for all open and closed files for the current year and the five (5) preceding years.” Section 3(2) requires documentation in each file sufficient to permit reconstruction of the insurer’s activities on the claim. That is the standard the regulator examines against.

    What this means for how you document a storm

    • Report the loss promptly and note the date and who you told — Section 5(1) makes notice to the agent notice to the insurer, so write down which one you called.
    • Get the roof photographed before anything is moved or covered, with dates attached. That is the front half of every deadline in the table above; our photo-documented inspection exists for exactly this.
    • Make the roof safe and stop the water without destroying the evidence. A temporary tarp and a dated photo set are not in tension — do both.
    • Keep your own dated log of every call, letter and email. The regulation gives the insurer duties that run from dates; you cannot invoke a date you did not record.
    • Read the wider sequence of a storm repair in our note on Kentucky storm restoration.
    • If you want an independent set of eyes on the roof first, send photos through our free roof photo diagnosis.

    On the roofs we look at after a storm, the difference between a straightforward claim and a slow one is almost never the damage. It is the file. A homeowner who can say “reported the fourteenth, photographs from the fifteenth, tarp on the sixteenth, estimate on the twentieth” is holding a timeline that lines up against the regulation’s day counts. A homeowner working from memory is arguing about what probably happened. The roof does not change between those two conversations; only the paperwork does.

    Central Roof Repair is a roofing contractor. We inspect, document and repair roofs. We do not adjust claims, negotiate with carriers or give legal or insurance advice, and nothing here is a prediction about what any carrier will do on any claim. The regulation quoted above is 806 KAR 12:095, adopted under the authority of KRS 304.2-110, as published by the Kentucky Legislative Research Commission, with its most recent effective date shown as 11-30-2021. Regulations change — read the current version at the link before relying on it. Questions about an insurer’s conduct belong with the Kentucky Department of Insurance, the state regulator, or with your own counsel. Central Roof Repair is owned by Marcos Gil, who is also a REALTOR® with Keller Williams Commonwealth and publishes Invest in the Gorge.

    Does the 30-day payment clock start when I report the storm?

    No. Section 6(1)(a) runs the thirty calendar days from the insurer’s receipt of proof of loss, not from your first phone call. The first call starts the fifteen-day acknowledgement clock in Section 5(1). Those are two different events with two different deadlines, and confusing them is the most common reason people think a carrier is late when it is not.

    What if the adjuster never gets back to me?

    Section 5(3) requires an appropriate reply within fifteen days to pertinent communications that reasonably suggest a response is expected, and Section 6(1)(d) requires a letter every forty-five days explaining why an investigation is still open. Put your follow-ups in writing so the dates exist. If you believe a carrier is not meeting the regulation, the Kentucky Department of Insurance is the state regulator for insurer conduct.

    Do these rules mean my roof claim has to be approved?

    No. 806 KAR 12:095 regulates how a claim is handled — the timing, the communication and the documentation — not whether a particular loss is covered. Coverage is decided by your policy and the facts of the loss. The regulation is about process, and process is the part you can actually control by reporting promptly and documenting well.

    Last updated: September 22, 2026

    By Marcos Gil — Central Roof Repair · Call or text (859) 310-1209.

  • How to Winterize Vacant Rental Homes Before a Freeze

    How to Winterize Vacant Rental Homes Before a Freeze

    A vacant rental can go from quiet to waterlogged in one hard freeze. To winterize vacant rental homes the right way, you need more than a thermostat setting and a locked door. You need to remove the conditions that let frozen pipes burst, roof leaks spread, gutters back up, and small exterior problems become expensive repairs while nobody is there to catch them.

    For landlords, cabin owners, and short-term rental hosts around the Red River Gorge, winter protection is not a one-size-fits-all checklist. A furnished cabin with guests arriving next weekend needs a different plan than a long-term rental that will sit empty until spring. The goal is the same: keep water out, keep pipes from freezing, and make sure somebody can spot trouble before it gets into the floors, walls, and framing.

    Start With the Water System

    Water does the most damage when a house is empty because a small failure can run for days. If the rental will be vacant for an extended period, shutting off the main water supply is usually the safest move. But shutting off the water alone does not empty pipes. Water left in a low section of line, an outdoor spigot, or a washing machine hose can still freeze and break fittings.

    Drain the plumbing after the main shutoff is closed. Open faucets on each level, flush toilets, and drain exterior hose bibs. Disconnect garden hoses completely. A hose left attached can hold water against the faucet and split the pipe inside the wall, which is a miserable surprise in February.

    For a property that will be fully unoccupied, have a qualified plumber winterize the system with the right process for the building. That may include blowing out supply lines and adding plumbing antifreeze to toilet bowls, tanks, sink traps, and floor drains. Do not pour automotive antifreeze into drains. Use plumbing antifreeze made for this purpose.

    If the rental needs to remain usable between bookings, leave the water on only when there is a real reason to do so. Keep the heat steady, insulate exposed pipes, and make sure someone checks the home after major cold snaps. This approach carries more risk than a full shutoff, but it can make sense for an active STR property with reliable local oversight.

    Set the Heat for the Building, Not the Calendar

    Turning the heat off to save money is how vacant homes get expensive fast. In most occupied or intermittently occupied rentals, keeping interior temperatures at 55 degrees or higher is a sensible baseline. Older homes, crawlspace homes, properties with plumbing on exterior walls, and cabins exposed to wind may need a higher setting.

    Do not trust a thermostat just because it has a fresh battery. Confirm the heat source is actually operating, replace furnace filters where applicable, and make sure vents are open and unobstructed. If the property uses propane, check the tank level before the coldest part of the season. A heat system cannot protect pipes after the fuel runs out.

    Electric space heaters are not a vacant-home solution. They can tip, fail, overload a circuit, or create a fire risk. Fix the building’s heat system instead of asking a portable heater to carry the whole house.

    Keep Roof Water and Gutter Water Moving

    A frozen pipe is dramatic, but roof and gutter problems can quietly destroy a vacant rental too. Wet leaves packed into valleys hold moisture against shingles and metal panels. Valleys full of leaves are how cabin roofs die. Once water works under flashing or finds a soft spot around a vent, it can soak insulation and framing long before a ceiling stain appears.

    Before winter, inspect the roof for lifted shingles, missing fasteners on metal roofing, damaged vent boots, loose chimney flashing, and old patchwork around penetrations. Look from the ground first, and do not climb onto a steep, wet, or icy roof. If there is a known leak, repair the source before winter weather turns a manageable repair into interior damage.

    Clean gutters and check that downspouts are attached, clear, and discharging away from the foundation. A clogged gutter can overflow behind fascia, soak the wood the weather gets to first, and create rot where you cannot see it from the driveway. Water dumped beside the foundation can also enter a crawlspace or basement when the ground is saturated.

    Pay attention to drainage around the property. Regrade low spots where possible, extend downspouts, and clear ditches or swales that are supposed to carry runoff away. In the hills around Beattyville, Slade, Campton, and Stanton, water rarely stays where you wish it would. It follows the easiest path, and that path should not be under your rental.

    Seal Up the Exterior Before Wind Finds the Gaps

    Winter wind pushes rain into places a summer shower may never reach. Walk the exterior and check doors, windows, siding corners, utility penetrations, crawlspace access panels, and soffit areas. Replace failed weatherstripping, secure loose siding, and repair broken latches that allow doors or windows to shift in strong wind.

    This is also the time to remove branches that hang over the roof, especially dead or split limbs. A branch does not have to punch through a roof to cause trouble. It can tear gutters loose, damage metal panels, break a skylight, or block drainage with a pile of wet debris.

    If the home has a crawlspace, close and secure access doors while keeping any intended ventilation strategy intact. The right setup depends on whether the crawlspace is vented, encapsulated, heated, or prone to standing water. Do not simply block every opening without understanding how moisture is managed underneath the house.

    Protect the Rental From Power, Pests, and Small Failures

    Unplug nonessential electronics and appliances, but do not shut down equipment that needs power for heat, sump pumps, alarms, cameras, or monitored leak sensors. Empty refrigerators if the power may be turned off, clean them, and leave doors propped open so mold does not take over the interior.

    Remove trash, food, candles, and anything that can attract pests or create a fire hazard. Mice are looking for the same thing you are: dry shelter. Seal obvious exterior gaps and check around pipe penetrations, foundation openings, and damaged siding. A cabin left empty with one loose vent screen can become a winter hotel for rodents.

    Test smoke alarms and carbon monoxide detectors, replace weak batteries, and verify that any security system still communicates after internet or power interruptions. If the property has a sump pump, test it before heavy winter rain. A working pump with a failed check valve or a frozen discharge line may not protect the basement when it matters.

    Build a Check-In Plan for Remote Owners

    A vacant property still needs eyes on it. Smart thermostats, water-leak sensors, cameras, and freeze alerts are useful, but they are not a substitute for a physical inspection. Internet drops. Batteries die. Sensors only report what they are installed to detect.

    Set a written check-in schedule based on the property’s risk. A newer rental on city utilities may need fewer visits than an older cabin with a crawlspace, propane heat, a steep roof, and a long driveway. After a major windstorm, prolonged freeze, heavy rain, or power outage, move the inspection up.

    Ask the person checking the rental to look for heat operation, active leaks, ceiling stains, standing water, fallen limbs, ice buildup, damaged gutters, and signs of entry. They should also take clear photos inside and out. Remote owners should not have to guess whether a problem was handled or whether someone simply drove past the driveway.

    Central Property Services provides before-and-after photos on property-care work because documented work matters when the owner is hours away. Whether you use a local contractor, a property manager, or a trusted neighbor, require the same kind of proof. A text that says “all good” is less useful than photos of the thermostat, utility room, roofline, and exterior conditions.

    Winterize Before the First Hard Freeze

    Do not wait for the forecast to show 20 degrees before making calls. Roof repairs, gutter work, plumbing service, and tree trimming are easier to schedule before every owner in the county realizes winter is coming. Early preparation also gives you time to correct what the inspection finds instead of applying a temporary patch in bad weather.

    Keep a simple property file with shutoff locations, utility contacts, heating details, photos of the plumbing layout, and the name of the person authorized to enter during an emergency. That information turns a stressful phone call into a fast response.

    The best winter plan is the one that fits how your rental will actually sit. Shut down and drain a truly vacant house. Maintain heat and regular checks for an active cabin. Either way, deal with the small water paths now, because winter has a way of finding every one you leave open.

  • Lexington Roof Code: Which Rulebook Your Re-Roof Answers To

    A re-roof in Lexington answers to one of two different code books, and which one depends on how many units are under it. Owners assume “residential” means anything you live in. Lexington-Fayette Urban County Government does not draw the line there — it draws it at two families. A duplex is on one side, a triplex is on the other, and the books on each side are not the same.

    Which building code covers a Lexington roof?

    For a house or a duplex, the Kentucky Residential Code. For three units or more, and for anything commercial, the Kentucky Building Code plus the existing-building code.

    LFUCG publishes its enforced code list openly. On the City of Lexington current building codes page, “Residential 1 & 2 Family Construction” is governed by the “2018 Kentucky Residential Code (2015 IRC with KY Amendments).” Under the separate heading “Commercial and Multi-Family Construction,” the listed codes include the “2018 Kentucky Building Code – 2015 IBC” and the “2015 International Existing Building Code.”

    Read those two headings next to each other and the practical line appears. One and two family dwellings sit under the residential book. A fourplex, an apartment building, a church, a strip centre and a warehouse all sit under the commercial and multi-family book — and work on an existing one of those brings the International Existing Building Code into the conversation, which is a different set of triggers from new construction.

    Two families is the line. Not “is somebody living in it” — how many units are under the roof.

    Why does the book matter if it is just a roof?

    Because the two books ask different questions about the same job, and the answers drive scope, inspection and cost.

    On a small-multifamily building an owner often expects a roof job to be priced and scheduled the way a single-family re-roof is. It frequently is not. The existing-building code path treats work on an occupied structure as its own category, and the review that follows is a commercial review. None of that makes the project harder to do well — it makes it a project that has to be scoped honestly at the estimate stage rather than discovered halfway through.

    This is also where the choice between a repair and a replacement stops being purely economic. If you are weighing those, our note on patching versus reroofing costs covers the trade-off, and roof decking replacement covers the item most likely to change the scope once the old covering is off.

    Who sets these codes in Kentucky, and can Lexington change them?

    The state adopts them. Local enforcement is local; the code itself is a state document.

    The Kentucky Residential Code is published by the Kentucky Department of Housing, Buildings and Construction. The 2018 Kentucky Residential Code Third Edition, dated August 2024, carries the department’s Frankfort address on its title page as the adopting authority. That is why the answer to “what does the code say” does not change when you cross a county line inside Kentucky — but the answer to “who inspects it and what does the permit cost” very much does.

    Does my roofer have to be registered with the city?

    In Lexington, yes — and an unregistered contractor cannot pull a permit for your job.

    LFUCG’s Building Inspection division states that “This ordinance requires all contractors to register with the Building Inspection,” and that “Unregistered contractors cannot obtain building permits.” The division describes its goal as ensuring “safe construction of projects by enforcing the Kentucky Building Code.”

    That is a two-second question worth asking any roofer bidding your building: are you registered with LFUCG Building Inspection, and will you be pulling the permit? If a job needs a permit and the contractor cannot obtain one, that constraint does not disappear — it gets pushed onto you, usually at the worst moment.

    What to do before you sign a roofing contract in Lexington

    • Count the units. One or two families, or three and up — that determines which code book your job is read under.
    • Ask which permit, if any, the job requires, and confirm it with LFUCG Building Inspection rather than taking it on faith either way.
    • Confirm the contractor is registered with Building Inspection before work is scheduled, not after.
    • Get the decking contingency in writing. Rotten decking is the most common mid-job change order on any re-roof, and it should be priced per sheet up front.
    • Ask who calls for inspection and what happens to the schedule if a correction is required.

    The pattern we see on small commercial and multi-family buildings is that the roof itself is rarely the complicated part. The paperwork around it is — which book, which permit, which inspection, and whether the contractor can legally carry the job through it. Sorting that out before the tear-off starts is the difference between a four-day project and a four-week one. For repair work and scope questions on an existing building, start with roof repair in Lexington, KY.

    Codes, ordinances and fee schedules change. Every code edition and quotation above is reproduced as LFUCG and the Kentucky Department of Housing, Buildings and Construction published it on the date noted, and permit requirements for a specific address and scope should be confirmed with LFUCG Building Inspection before you rely on them.

    Is a duplex treated as residential or commercial in Lexington?

    LFUCG lists the 2018 Kentucky Residential Code under “Residential 1 & 2 Family Construction,” so a two-family building falls on the residential side of the list. A third unit moves the building into the “Commercial and Multi-Family Construction” grouping. Confirm the classification for your specific property with Building Inspection.

    Does every roof repair need a permit?

    LFUCG does not publish a roofing-specific permit rule on its building permits pages, so the honest answer is that it depends on the scope and the building, and the division is the authority that decides. Ask before the work is scheduled. A contractor who will not put the permit question in writing is telling you something.

    Do the same codes apply in Richmond and Madison County?

    The Kentucky Building Code and Kentucky Residential Code are state documents published by the Department of Housing, Buildings and Construction, so the code text is statewide. Enforcement, permit fees and inspection scheduling are handled by the local jurisdiction, so confirm those with the building department for the county the property sits in.

    Last updated: September 21, 2026

    Central Roof Repair — roof repair across Central Kentucky. By Marcos Gil, REALTOR® — Keller Williams Commonwealth · KY Real Estate License No. 296259 · Call or text (859) 310-1209.

  • Storm Restoration After a Kentucky Roof Hit

    Storm Restoration After a Kentucky Roof Hit

    A storm can tear a shingle loose at noon and leave water running down a bedroom wall by midnight. Around Beattyville, Slade, Stanton, Campton, and the Red River Gorge, storm restoration is not just about making a roof look normal again. It is about stopping water, finding where the weather got in, and protecting the parts of the property that cost the most to replace.

    That is especially true for cabins and short-term rentals. An owner may be two states away while wind drives rain beneath lifted metal panels, a tree limb punches a hole near the ridge, or backed-up gutters send water behind the fascia. The first job is not selling a new roof. The first job is getting the property dry and getting a straight answer about what actually needs repair.

    What Storm Restoration Should Handle First

    After high wind, hard rain, hail, or a fallen limb, the visible damage is only part of the story. Missing shingles, bent flashing, torn siding, and branches on the roof need attention, but water often enters at less obvious places: a chimney transition, pipe boot, valley, roof-to-wall connection, or old fastener hole.

    A proper response begins with a safe exterior assessment and an interior check where possible. Fresh ceiling stains, wet insulation, bubbling paint, damp attic decking, and musty smells are all clues. Water does not always show up directly below the opening. It can travel along framing, roof decking, wiring, or insulation before it finds a place to drip.

    If rain is still coming or the roof is open, a temporary dry-in or emergency tarp is the priority. A tarp is not a repair, but it can be the difference between replacing a few damaged materials and dealing with soaked drywall, ruined flooring, mold conditions, or rot in the framing.

    For remote owners, documentation matters just as much as speed. Before-and-after photos show what was found, what was protected, and what was repaired. That gives a cabin owner or property manager something better than a vague text saying the job is done.

    Storm Restoration Is Usually a Repair Decision First

    Storm damage does not automatically mean full roof replacement. Sometimes a roof has reached the end of its useful life, and replacement is the sensible call. But a localized leak from displaced flashing, a few wind-damaged shingles, cracked pipe boots, loose ridge cap, or damaged metal-roof screws can often be repaired without replacing the whole system.

    The right answer depends on the roof’s age, material, condition before the storm, and how widespread the damage is. A newer shingle roof with one torn section calls for a different plan than an older roof with widespread granule loss, multiple active leaks, and soft decking. The same goes for metal roofs. A few backed-out fasteners and failed sealant points are repair work. Widespread corrosion, loose panels, or damaged framing may call for more.

    Be cautious with anyone who reaches a replacement conclusion from the driveway. A roof needs a close look at the places where water enters and at the materials beneath the visible surface. The goal is to repair the actual source of the problem, not simply cover up a stain or recommend the biggest possible job.

    Damage that needs same-day attention

    Some problems should not wait for a convenient appointment. Call for immediate help when a tree or limb has struck the roof, a section of roofing is missing, water is actively entering the building, flashing has peeled back, or a commercial flat roof is holding water after a storm.

    A cabin with guests arriving soon also needs a quick response, even if the leak appears small. Water, guests, and a weekend turnover schedule are a bad combination. A fast dry-in gives you room to make a permanent repair correctly instead of rushing through one while the property is exposed.

    The Trouble Spots Kentucky Storms Expose

    Wind rarely damages a roof evenly. It gets under edges, catches weak flashing, lifts shingles that were already losing their seal, and pushes rain uphill into places that normally shed water. Heavy rain then finds every neglected drainage problem on the property.

    Valleys are a common failure point around wooded cabins. Valleys full of leaves are how cabin roofs die. The debris holds moisture, slows drainage, and gives wind-driven rain a place to work its way beneath roofing material. Clogged gutters do much the same thing at the roof edge. Water spills over, wets fascia and soffit, and eventually attacks the wood the weather gets to first.

    Chimneys, skylights, dormers, and roof-to-wall transitions also deserve close attention after a storm. These are not areas where a tube of caulk is always a real fix. Failed step flashing, damaged counterflashing, cracked masonry joints, and rotten trim may need targeted repair so water is directed away from the building instead of trapped behind a surface patch.

    For commercial properties, storm restoration may involve EPDM, TPO, modified bitumen, or other flat-roof systems. Look for lifted seams, punctures, open flashing, clogged drains, and ponding water. A small opening in a membrane can let water migrate far beyond the visible damage, so timely leak tracing matters.

    What to Do Before Help Arrives

    Do not climb onto a wet or wind-damaged roof. Loose shingles, hidden punctures, wet decking, and downed limbs turn a simple inspection into a fall risk fast. Take photos from the ground if it is safe, including visible roof damage, fallen branches, standing water, and interior stains.

    Inside, move furniture, electronics, linens, and rental supplies away from active leaks. Catch dripping water in containers and protect floors with towels or plastic sheeting. If a ceiling is sagging with trapped water, stay out from under it and keep guests away from the area. A water-heavy ceiling can fail without much warning.

    If the property is vacant, shut off water only if you suspect a plumbing issue rather than roof damage. Do not assume every ceiling stain came from the storm. A good inspection separates roof leaks from failed plumbing, condensation, and other causes before money is spent in the wrong place.

    Keep receipts for emergency mitigation, photos, and notes about when the damage occurred. If you plan to file an insurance claim, this record can help. Insurance coverage varies by policy and cause of loss, so a contractor should document damage clearly but should not promise what an insurer will approve.

    Permanent Repairs Should Address Water, Not Just Appearance

    Once the roof is dry and conditions are safe, the permanent work should solve the pathway water used. That might mean replacing damaged shingles and underlayment, resetting metal panels, repairing flashing, replacing a pipe boot, sealing a penetrated membrane, fixing rotted decking, or correcting drainage that keeps sending water where it does not belong.

    It can also include related exterior work. Storms may tear loose gutter sections, bend downspouts, open siding seams, damage trim, or expose rotten fascia. Leaving those issues behind can undermine an otherwise solid roof repair. Water management is a property system, not a single trade line.

    For cabins and rentals, consider what the next hard rain will reveal. A repaired leak is good. A cleared valley, working gutter, solid chimney flashing, and photos showing the finished work are better protection for the next guest, the next booking, and the next storm.

    Make the Next Storm Less Expensive

    The cheapest storm damage is often the damage that never gets the chance to spread. Regular gutter cleaning, valley clearing, loose-flashing checks, tree-limb trimming, and small roof repairs keep a weather event from turning into a major interior project. This matters most on properties that sit empty for days or weeks at a time.

    Central Property Services approaches storm work repair-first: protect the building, identify the source, repair what is damaged, and document the result. If the roof needs more than a repair, you should hear that plainly. If it does not, you should not be pushed into replacement.

    When the rain stops, do not judge the property by whether the drip stopped too. Look for the place water will try next, and fix it before the next forecast gives it another chance.

  • How to Replace Damaged Pipe Boots Before Leaks

    How to Replace Damaged Pipe Boots Before Leaks

    A roof can look fine from the driveway and still leak around one small plumbing vent. That is why homeowners need to replace damaged pipe boots before a cracked rubber collar turns into wet insulation, stained ceilings, rotten decking, or a guest complaint at a rental cabin.

    Pipe boots are not flashy. They sit around the plumbing vent pipes that come through your roof, usually several feet below the ridge. But they are one of the roof penetrations weather attacks first. Sun cooks the rubber. Winter cold stiffens it. Wind works at the flashing. On cabins in the Red River Gorge, heavy leaf cover and slow-drying shade can keep that area damp longer than it should be.

    The good news is that a failed pipe boot often has a targeted repair. The bad news is that waiting on it can turn a small roof detail into a larger carpentry and interior repair.

    What a Pipe Boot Does on Your Roof

    A plumbing vent pipe carries sewer gases safely out of the house. Where that pipe passes through the roof, it needs a waterproof transition. The pipe boot, sometimes called a vent boot or pipe flashing, is that transition.

    Most installations combine a metal or plastic flashing base with a rubber, neoprene, or silicone collar that fits tightly around the pipe. The upper part of the flashing slides beneath the roofing material, while the lower portion rests on top to shed water downhill. When installed correctly, water moves around the pipe instead of following it into the roof.

    That system depends on the collar staying flexible and sealed. Once it splits, pulls away from the pipe, or becomes brittle, rain has a direct route under the roofing. A small opening can leak only during wind-driven rain at first. Then it becomes a regular problem as the opening widens.

    Signs You Need to Replace Damaged Pipe Boots

    You do not always need to climb onto a roof to spot trouble. Start with the ceiling directly below plumbing vent locations, then check the roof from the ground with binoculars if you can do so safely. Look for these warning signs:

    • Cracked, dry-rotted, curled, or missing rubber around the vent pipe
    • A dark ring, water stain, peeling paint, or soft drywall near a bathroom, kitchen, or laundry ceiling
    • Damp attic insulation or darkened roof decking around a vent penetration
    • Rusted metal flashing, lifted shingles, or exposed fasteners near the pipe
    • A leak that appears after hard rain or wind but seems to disappear in dry weather

    A boot can fail without making an obvious interior stain. Water may run down the underside of the roof deck, travel along a framing member, and show up several feet from where it entered. That is why leak location and entry location are not always the same thing.

    For remote cabin owners, a musty odor, a discoloration noticed during a turnover clean, or a message from a guest should not be brushed off as a minor issue. Water has likely been working longer than anyone realizes. The wood the weather gets to first is rarely the only wood affected.

    How Professionals Replace Damaged Pipe Boots

    Replacing a pipe boot is not usually a full-roof job. On an asphalt shingle roof, the repair generally involves loosening the shingles around the vent, removing the old flashing, installing a correctly sized replacement, and putting the roofing back together so water sheds properly.

    The work begins with diagnosis. A good repair tech checks the pipe itself, the flashing base, nearby shingles, nail placement, roof decking, and attic side when accessible. If the pipe is loose, broken, or cut too short, simply putting a new boot over it may not solve the problem. If the deck is soft, the repair may need a small section of wood replaced before new flashing goes in.

    Next, the surrounding shingles are carefully lifted. The old boot or flashing is removed without tearing sound shingles that can be reused. The new base is slid under the upper course of shingles and over the lower course. That overlap matters. Roofing is a water-shedding system, not a caulk bucket.

    Fasteners should be placed where they will stay protected by the next layer of roofing whenever possible. Exposed nail heads and open seams are common shortcuts that create another leak point down the road. A small amount of compatible roofing sealant may be used at specific details, but sealant is not a substitute for proper flashing order.

    Metal roofs require a different approach. A replacement boot must match the pipe diameter and work with the roof panel profile. On some metal systems, a flexible retrofit boot can be installed around the pipe without removing large sections of roofing. The boot still needs to sit flat, be properly sealed to the panel, and be fastened in a way that handles expansion and contraction. Metal moves with temperature swings. A repair that is too rigid can fail early.

    Why the Cheap Patch Often Fails

    It is tempting to smear roof cement around a cracked boot and call it done. That may slow a leak for a short time, especially if rain is on the way, but it does not restore failed rubber or correct loose flashing. Thick sealant also hides the actual condition of the boot, making a later inspection harder.

    A slip-on rubber repair collar can be useful in the right situation. It can extend the life of an otherwise sound flashing base when the pipe is the right size and the surrounding roof is in good shape. It is not the best answer when the flashing is rusted, shingles are damaged, or water has already gotten underneath the assembly.

    Material choice matters, too. Standard rubber boots are common and affordable, but Kentucky sun and temperature changes take their toll. Silicone boots generally hold up better against ultraviolet exposure and remain more flexible in cold weather. The right choice depends on roof type, pipe size, existing flashing, budget, and how much useful life remains in the surrounding roof.

    If an aging roof has several failing boots, lifted shingles, exposed fasteners, and granule loss, treating every item as an isolated repair can become false economy. Repair-first means fixing the actual problem without selling a roof you do not need. It also means being honest when several small failures point to a roof system nearing the end of its service life.

    Safety and Timing Matter More Than Most Owners Think

    A one-story home with a low roof pitch may look like an easy do-it-yourself repair. It can still be dangerous. Wet shingles, loose gravel, steep slopes, high winds, and soft decking turn a quick job into a fall risk. Cabin roofs can be especially tricky because terrain, tree cover, and limited access make ladder placement harder.

    If you are comfortable working on roofs and can do it safely, inspect the boot after rain and on a dry day. Do not work alone, do not step on questionable decking, and do not try to force shingles apart in cold weather when they are brittle. A damaged shingle caused during a rushed repair can create a new entry point for water.

    For most owners, the better move is to schedule the repair while the problem is still small. If active water is entering the home or cabin, protect belongings, place a container under the drip, and get the roof checked promptly. A temporary tarp may be needed after storm damage, but it should lead to a permanent repair, not become the permanent plan.

    Check More Than One Vent While You Are There

    Pipe boots tend to age at a similar rate because they face the same weather on the same roof. When one boot is cracked, inspect the others. A home may have vent pipes for bathrooms, kitchens, laundry areas, and plumbing stacks. A cabin with additions or remodeled bathrooms may have more penetrations than the owner expects.

    This is also a good time to look at nearby roof details. Valleys full of leaves are how cabin roofs die. Debris holds moisture, backs up runoff, and keeps flashing areas wet. Check for clogged gutters, branches rubbing the roof, loose ridge caps, cracked sealant around other penetrations, and chimney flashing issues. You do not need a long repair list to benefit from a careful inspection. You need a straight answer about what is sound, what needs attention soon, and what is letting water in now.

    For owners who live out of town, photo documentation matters. Before-and-after photos show the cracked boot, the condition beneath it, and the finished repair. That is proof you can keep with your property records, share with a property manager, or use when planning future maintenance.

    A damaged pipe boot is a small part with a big job. Catch it early, repair it correctly, and your roof can keep doing what it is supposed to do: send water away from the building instead of into it. If you need an honest roof repair assessment in the Red River Gorge region, Central Property Services can inspect the problem, document the work, and help protect the property before a minor leak becomes a major interruption.

  • How to Find Leaks Beneath Shingles Before Rot

    How to Find Leaks Beneath Shingles Before Rot

    A brown ceiling spot is usually not where the roof is leaking. Water can enter near a ridge, chimney, vent, valley, or damaged shingle, then travel along roof decking, rafters, insulation, or wiring before it finally shows itself indoors. To find leaks beneath shingles, you have to follow the water path backward instead of patching the first stain you see.

    That matters around Beattyville, Slade, and the Red River Gorge. Cabins sit under heavy tree cover, storms drive rain sideways, and many properties stay empty between guest turnovers. A small roof opening can keep feeding wet wood for weeks before anybody notices. By then, a repair that could have been a flashing fix may include decking, trim, insulation, drywall, or rot repair.

    Start Inside and Work Toward the Roof

    Begin when the roof is dry and there is enough daylight to see clearly. Check the ceiling in the room below the stain, but do not stop there. Look several feet uphill from the stain if you know the roof slope. Water moves downhill, but it also follows framing and can travel farther than most owners expect.

    In an attic or vaulted-ceiling access area, use a flashlight and look for darkened roof decking, damp insulation, rusty nail points, moldy sheathing, or shiny wood that looks recently wet. Run a hand close to suspicious areas without pressing hard on soft wood. A musty smell is also a clue, especially in cabins that have been closed up.

    The highest visible water mark is often more useful than the lowest one. If a rafter has staining that stops near a roof penetration or valley, that gives you a better starting point than the ceiling stain below it. Take photos as you go. They help track whether the problem is active after the next rain, and they give a repair professional a clearer picture before arriving.

    Do not step through attic insulation or onto drywall. Walk only on framing or installed decking. If access is tight, the ceiling is sagging, or you see electrical wiring near active water, stop and get help. A roof leak is not worth a fall or an electrical hazard.

    Where Leaks Beneath Shingles Usually Begin

    Shingles get blamed for plenty of leaks they did not cause. The field of the roof may be in decent shape while water is getting in at a detail where materials meet. Roof repairs are often about finding that one failed connection and correcting it properly.

    Flashing Around Chimneys, Walls, and Pipes

    Flashing is the metal or membrane that directs water away from vulnerable joints. Chimneys are a common trouble spot because masonry, roofing, and metal all expand and move differently over time. Cracked sealant, loose counterflashing, missing step flashing, or a failing cricket behind a chimney can let water into the roof system.

    Plumbing vent boots are another frequent source. The rubber collar around the pipe can split from sun exposure, pull loose, or crack at the base. From the ground, a vent boot may look fine. Up close, a small split can explain a ceiling stain that only appears during wind-driven rain.

    Valleys, Roof Transitions, and Low Slopes

    A valley carries more water than nearly any other part of a shingle roof. Leaves, pine needles, and small branches trap moisture there and hold it against shingles. Valleys full of leaves are how cabin roofs die. The debris slows drainage, hides damaged shingles, and can force water under laps during a hard downpour.

    Watch roof-to-wall transitions, dormers, porch additions, and spots where a steep roof meets a lower one. These areas need correctly layered flashing. Caulk alone is rarely a lasting answer when the underlying flashing is missing, bent, or installed in the wrong sequence.

    Low-slope sections deserve separate attention. Standard shingles do not perform the same way on a shallow pitch as they do on a steeper roof. Water can back up beneath them if drainage is poor, especially where a metal roof or porch roof ties into the main house.

    Missing, Lifted, or Damaged Shingles

    Wind may not remove a shingle completely. It can break the seal strip, lift an edge, pull nails loose, or crease a tab so it no longer lies flat. Hail can bruise shingles and knock granules loose, while tree limbs can puncture them outright.

    Look from the ground for uneven lines, exposed nail heads, torn tabs, or shingles that appear darker than those around them. Use binoculars if needed. Do not climb onto a wet, steep, mossy, or aging roof just to inspect it. The safest inspection is often from the attic, the ground, and a ladder at the eaves, followed by a professional roof check.

    Use a Controlled Water Test When the Leak Is Stubborn

    If you have attic access and the roof is safe to test, a controlled hose test can help narrow down a hard-to-find leak. This takes two people. One person stays inside with a flashlight while the other runs water slowly over one small roof section at a time.

    Start low and work upward. Soak a small area for several minutes, then wait for the person inside to report moisture. Move to the next section only after the first area has been checked. Spraying the whole roof at once tells you almost nothing, because water may enter in one spot and appear somewhere else.

    Never use a pressure washer. High-pressure water can force its way under shingles and create a leak that was not there before. Skip the test during freezing conditions, lightning, strong wind, or when the roof surface is slick.

    Rule Out Gutter and Drainage Trouble

    Not every drip at the edge of a roof means failed shingles. Clogged gutters can send water behind the gutter, into fascia boards, and down exterior walls. Overflow can rot the wood the weather gets to first, then create stains that look like a roof failure.

    Check for gutters packed with leaves, loose hangers, standing water, disconnected downspouts, and splashback near the foundation. On cabins surrounded by trees, gutter cleaning is not cosmetic work. It is part of protecting the roof edge, fascia, siding, and crawlspace from repeated water exposure.

    Ice can create a similar problem in winter. If water backs up at the eaves and refreezes, it can work under shingles and wet the decking. The long-term fix may involve attic ventilation, insulation improvements, drainage corrections, and repair of the damaged roof edge. It depends on what is actually causing the backup.

    Know When a Repair Is Enough

    A leak does not automatically mean you need a new roof. A single failed pipe boot, cracked chimney flashing, damaged valley section, or wind-lifted shingle can often be repaired without replacing the entire roof. That is why diagnosis comes first.

    Replacement starts making more sense when damage is widespread, shingles are near the end of their service life, decking is soft across multiple areas, or repeated leaks point to a larger installation problem. A straight answer should include both possibilities. If a localized repair will protect the property, that should be on the table.

    For remote cabin owners and rental hosts, documentation matters just as much as the repair. Ask for clear before-and-after photos showing the source, the damaged materials, and the completed work. That gives you proof for your records, helps explain repairs to partners or guests, and makes future maintenance decisions easier.

    Act Before the Next Hard Rain

    If water is actively dripping, move belongings, place a container under the drip, and relieve a bulging ceiling carefully only if it is safe to do so and away from electrical fixtures. Then get the roof protected. An emergency tarp can stop more water from entering while the actual repair is scheduled.

    Central Property Services approaches leaks repair-first: locate the entry point, inspect the surrounding materials, and fix what is needed without turning every small roof problem into a replacement sale. For homes, cabins, rentals, and commercial properties, fast local response and job photos remove a lot of uncertainty when the weather does not wait.

    The best time to investigate a roof leak is when the stain is small, the wood is still solid, and the repair is still focused. Water is patient. Do not give it another season to work.

  • Remote Property Oversight Guide for Cabin Owners

    Remote Property Oversight Guide for Cabin Owners

    A cabin can look perfectly fine in a listing photo and still be taking on water behind the chimney, under a loose metal panel, or through a gutter that has been overflowing for months. That is the hard part of owning property from a distance. This remote property oversight guide is for cabin owners, short-term rental hosts, landlords, and property managers who need to protect a place they cannot drive past every week.

    In the Red River Gorge region, weather finds weak spots fast. Heavy rain, wind, wet leaves, freeze-thaw cycles, and long stretches between visits can turn a small maintenance issue into rotten decking, stained ceilings, damaged drywall, or a booking cancellation. Remote oversight is not about checking on a property constantly. It is about having a clear system for spotting trouble early, making good repair decisions, and getting proof the work was done.

    Start With the Places Weather Hits First

    A remote property plan should focus on the parts of the building that take the most abuse. Roof valleys, chimney flashing, pipe boots, gutters, downspouts, decks, siding transitions, crawlspace vents, and exterior wood trim deserve attention before cosmetic details. The wood the weather gets to first is usually the wood that costs the most later.

    For cabins surrounded by trees, gutters and roof valleys should be treated as working systems, not background features. Valleys full of leaves are how cabin roofs die. Water backs up, works under shingles or metal edges, and keeps the roof area wet long after the rain stops. A gutter may be clogged at one corner while the owner sees nothing wrong from a driveway photo.

    Ask for seasonal exterior checks, especially after leaf drop and after major storms. A good inspection does not need to become a sales pitch for a new roof. It should answer plain questions: Is there an active leak? Where is water going? What needs repair now? What can wait? If it does not need work, you should be told so.

    Build a Remote Property Oversight Routine

    The right schedule depends on the property. A full-time rental with frequent guest turnover needs more eyes on it than a personal cabin used a few weekends a year. A newer home on open ground may need less roof attention than an older cabin under heavy tree cover. Still, every remote owner benefits from a repeatable routine instead of waiting for someone to notice a stain.

    At minimum, arrange for a property check after severe wind or hail, before winter, after winter, and after the heaviest leaf season. If the cabin is a short-term rental, build a visual exterior check into turnover or cleaning procedures. Cleaners and local contacts do not need to diagnose roof systems, but they can flag a ceiling spot, a dripping soffit, standing water, loose siding, or a downspout that has pulled away.

    Your routine should also cover the inside. Ask whoever checks the property to look in ceilings, around windows, beneath sinks, near water heaters, and along exterior walls. Musty odor, soft flooring, peeling paint, and a brown ceiling ring are not small details. They are often the first evidence that water has already been working where it should not.

    Use a Simple Reporting Standard

    The best remote oversight is visual and specific. A text saying “roof looked okay” is not enough if you are three hours away and a storm just came through. Ask for dated photos of the front, rear, roof edges where visible, gutters, chimney area, problem spots, and completed repairs.

    Before-and-after photos matter even more when work is needed. They help you understand what failed, what was repaired, and whether the repair addressed the source of the issue. They also give you a useful record for future maintenance, insurance discussions, property managers, and guest-related damage questions.

    Keep those photos in one folder by property and date. Add invoices, notes about leaks, and records of prior repairs. When a contractor can see that the same chimney corner has leaked twice or that a gutter was repaired last fall, diagnosis gets faster and guesswork goes down.

    Have a Storm Plan Before the Phone Starts Ringing

    After a hard storm, local contractors get calls all at once. The owners who already know who can inspect, tarp, and document damage usually have a better chance of limiting the loss. Waiting until water is dripping onto a bed or a guest is asking for a longer, more expensive day.

    Your storm plan should name one local point of contact, set a spending threshold for emergency work, and state how you want approvals handled. For example, you may authorize an emergency tarp-up and photo inspection up to a set amount, while requiring a call before larger repairs begin. That keeps a minor emergency from sitting open while you are in a meeting or out of cell range.

    A tarp is not a repair, but it can be the right first move. When wind lifts shingles, a branch punctures a roof, or flashing comes loose before another rain, stopping more water from entering is the priority. Then the property needs a real diagnosis. Sometimes the fix is localized flashing work, a pipe boot, a section of metal roofing, or damaged roof decking. Sometimes the damage is larger. A straight answer should come before a replacement recommendation.

    Watch the Drainage, Not Just the Roof

    Many remote owners think “roof leak” when they see interior water damage. Sometimes the roof is the problem. Other times, water is spilling over clogged gutters, running behind siding, pooling against the foundation, or entering through failed exterior trim.

    Look at where water leaves the building. Downspouts should carry it away from the foundation, not dump it at the corner. Ground should not slope toward the cabin. Splashing water around a deck ledger, door threshold, or crawlspace can cause slow damage that is easy to miss from a distance.

    This is especially true for cabins on hillsides and wooded lots around Slade, Stanton, Campton, Beattyville, and the surrounding counties. The terrain is part of the maintenance picture. A repair-first contractor should look at the whole water path before blaming one piece of the roof.

    Protect Revenue at Rental Properties

    For STR owners, oversight is also guest protection. A leak over a bed, a loose handrail, a soft deck board, or a failed gutter at an entry can become a refund, a bad review, or a safety problem. The goal is not to overreact to every scuff or minor issue. The goal is to fix the things that can interrupt a stay or damage the building.

    Give cleaners and co-hosts a short list of items worth reporting immediately: active water, ceiling stains that are growing, roof debris, broken windows, loose exterior steps, sagging gutters, soft wood, and signs of pests or moisture. Photos should accompany the report whenever possible. That lets you decide whether it needs same-day attention or a scheduled repair.

    It also helps to plan work around occupancy. Non-emergency repairs are easier and less disruptive between stays. Emergency repairs do not wait for a convenient calendar, but clear communication can keep guests informed and reduce frustration.

    Choose Local Help That Documents the Work

    Remote ownership depends on trust, but trust should not mean taking work on faith. Choose a local provider who answers the phone, understands the area, can dispatch when weather hits, and documents what they find. Ask whether they repair specific problems or primarily sell full replacements. Those are different approaches.

    Central Property Services works with remote owners across the Gorge region by providing photo diagnosis and before-and-after documentation on every job. That matters when you cannot stand in the yard, look up at the roof, or inspect the repair yourself. You should know what happened, what was done, and what to keep an eye on next.

    The cheapest quote is not always the lowest-cost decision. A quick patch without finding the water source can lead to repeat damage. On the other hand, a full replacement is not automatically the honest answer to a localized leak. Good oversight means matching the repair to the actual condition of the property.

    A remote property does not need constant worry. It needs local eyes, a clear response plan, and repair records that tell the truth about what is happening at the building. Handle the small water path before it becomes the big construction project.

  • Roof Inspections That Catch Trouble Early

    Roof Inspections That Catch Trouble Early

    A cabin can look perfectly fine from the driveway while water is working its way behind the chimney flashing, under a lifted metal panel, or into a valley packed with wet leaves. By the time a brown ceiling stain shows up, the roof problem may have been feeding rot for weeks. That is why roof inspections are not busywork. They are how owners catch small, repairable trouble before it becomes a bigger bill, a guest complaint, or a wet mess during the next hard rain.

    For homes, cabins, rentals, churches, and small commercial buildings around Beattyville and the Red River Gorge, a good inspection starts with one question: where is water most likely getting in? The answer is rarely just “the roof.” It is usually a seam, penetration, transition, drainage problem, or storm-damaged section that needs a close look.

    What Roof Inspections Should Actually Find

    A useful inspection is more than someone standing in the yard and saying the shingles look old. It should identify the roof’s weak points and separate cosmetic wear from damage that needs attention now.

    On shingle roofs, that means checking for missing, cracked, lifted, or heavily granulated shingles. It also means looking closely at ridge caps, valleys, pipe boots, skylights, vents, chimneys, and wall-to-roof transitions. Those details take the most punishment because they interrupt the roof’s water-shedding surface.

    Metal roofs need their own kind of attention. Loose or backed-out screws, worn washers, open lap seams, failed sealant, rust around fasteners, and damaged flashing can all let water in. A metal roof may last a long time, but it is not maintenance-free. A small leak at one screw line can wet insulation or decking without making a dramatic mark inside right away.

    Flat and low-slope roofs, including EPDM and TPO systems, require a different eye again. Ponding water, split seams, punctures, edge failures, and clogged drains matter more than the age of the surface alone. If water stays where it should be draining, the roof is telling you something.

    The inspection should include gutters and drainage when they affect the roof. Valleys full of leaves are how cabin roofs die. Water backs up, works under roofing materials, and keeps wood wet longer than it should be. The wood the weather gets to first is often at the eaves, fascia, and roof edge.

    When to Schedule a Roof Inspection

    A roof does not have to be actively leaking to deserve attention. For most properties, an inspection once a year is a sensible baseline, preferably before the season when storms, leaf buildup, or freezing weather will test the roof hardest.

    Cabins and short-term rentals often need more frequent checks. Trees, long gaps between visits, and changing guests create a different risk profile than an occupied home. If your property sits empty for part of the year, a small problem can keep growing with nobody there to notice the first drip. An inspection before a busy rental season, after leaf fall, and following a major storm is often money well spent.

    There are also moments when waiting is a bad bet. Schedule a prompt inspection after high winds, hail, a fallen limb, or a storm that sends water into the attic or ceiling. Call if you see a new stain, peeling paint near a ceiling line, wet insulation, a musty attic smell, loose roofing material in the yard, or gutters pulling away from the fascia.

    Not every storm calls for a full roof replacement. In fact, many do not. But a storm can loosen flashing, crease shingles, shift metal trim, or open a seam just enough to start a leak. Finding that one failed spot early is the whole point.

    What Happens During a Professional Inspection

    A thorough roof inspection should begin with the property, not a sales pitch. The inspector should ask what you have seen: a leak location, when it appears, whether it happens only in wind-driven rain, how old the roof is, and what repairs have been made before. A ceiling stain near a chimney, for example, can come from flashing, a roof-to-wall detail, a pipe penetration uphill, or condensation. Guessing wastes time.

    From the ground, the roofline, gutters, downspouts, siding, fascia, chimney, and visible drainage paths provide clues. Then, when conditions allow safe access, the roof surface gets a closer review. The attic or interior space matters too. Water often travels along framing before it shows itself, so the visible stain is not always directly below the entry point.

    Photo documentation makes the inspection more useful, especially for owners who live hours away. Clear photos of the issue, the surrounding area, and the completed repair remove a lot of uncertainty. You should be able to see what was found and understand why a repair is recommended.

    Central Property Services provides before-and-after photos because remote owners should not have to take a contractor’s word for it. If the roof needs a targeted repair, the evidence should support that recommendation. If it does not need work, you deserve that straight answer too.

    Repair First Does Not Mean Ignore a Worn Roof

    There is a practical middle ground between “patch everything forever” and “replace it all now.” A repair-first inspection looks for the actual source of failure and considers whether a focused repair will protect the building for a reasonable period.

    A missing shingle, failed pipe boot, open flashing joint, or damaged ridge cap may be a straightforward repair. So may a metal roof with a handful of failed fasteners or sealant joints. Replacing an entire roof for one repairable defect does not make sense.

    But there are times when repair becomes a poor investment. If roofing materials are broadly brittle, the decking has widespread damage, leaks are showing up in multiple unrelated areas, or repeated repairs are chasing failures across an aging roof, replacement may be the more honest recommendation. The right answer depends on the roof system, its age, the building’s use, and how long you plan to hold the property.

    For rental owners, the decision also includes downtime. A small preventive repair made between bookings is usually easier and cheaper than an emergency response when guests are already checking in under a leaking ceiling.

    A Few Things Owners Can Check Safely

    You do not need to walk a roof to stay alert. In fact, walking a steep, wet, high, or unfamiliar roof is how people get hurt and how fragile materials get damaged. Start from the ground, use binoculars if needed, and check the attic after heavy rain.

    Look for displaced shingles or metal panels, sagging gutters, dark streaks below roof edges, branches rubbing the roof, piles of debris in valleys, and water spilling over gutters. Inside, watch for fresh staining, damp insulation, bubbling drywall, or a smell that suggests moisture has been trapped too long.

    Keep records of what you see. A quick phone photo after a storm can help establish whether damage is new. For a cabin or rental, ask a cleaner, caretaker, or guest-turn crew to report ceiling stains, dripping sounds, and wet spots immediately. Small observations are often what prevent a larger loss.

    The Cost of Waiting Is Usually Hidden at First

    Roof problems rarely announce themselves with a dramatic hole. More often, water enters in a small amount and repeatedly wets the same framing, insulation, drywall, or trim. That is when a modest flashing repair turns into decking replacement, interior repairs, mold cleanup, or rot around a chimney chase.

    For a short-term rental, the cost can also include canceled stays, refunds, rushed cleaning, and damage to furniture or finishes. For a commercial property, it can mean slippery floors, interrupted operations, or inventory damage. The roof is not just a surface overhead. It protects everything that makes the property valuable.

    A good inspection gives you a clear condition report and time to make a decision before the weather makes it for you. If a storm has hit, a leak has appeared, or your cabin has been sitting through another leaf season, get eyes on the roof now. A focused repair today may be all it takes to keep the next rain outside where it belongs.