
Blog

  • Why Photo Documented Property Inspections Matter

    Why Photo Documented Property Inspections Matter

    A cabin roof can look fine from the driveway while a clogged valley is holding water against the shingles. A rental can appear ready for guests until a loose piece of flashing starts letting water into a ceiling corner. That is why photo documented property inspections matter, especially when you own property in the Red River Gorge region but live hours away.

    A verbal update is useful. Clear photos are better. They show what was found, where it was found, what condition it was in before work started, and what changed after the repair. For a homeowner, landlord, cabin owner, or property manager, that is not extra paperwork. It is proof that helps protect the property and the money tied up in it.

    What a Photo Documented Property Inspection Should Show

    A useful inspection is more than a few wide shots of a roofline. The photos need to tell a clear story. If there is a leak, you should be able to see the likely entry point, the affected material, and the repair area. If gutters are overflowing, the photos should show whether the problem is leaves, a sagging run, a failed connection, or drainage that is dumping water against the foundation.

    Good documentation starts before anything is touched. That matters because a repair can look simple after the damaged material is removed. A picture of missing shingles, open flashing, split pipe boots, rotted fascia, or a valley packed with wet leaves shows why the work was needed in the first place.

    After the work is complete, the photos should show the repair from close enough to be meaningful. On a roof, that may include sealed fasteners, replaced flashing, a patched membrane seam, a properly secured ridge cap, or a clean valley where water can move again. On the ground, it may show repaired gutter hangers, a corrected downspout outlet, patched siding, or exposed rot that was removed and rebuilt.

    The goal is not to make every problem look dramatic. If a condition is minor, the photos should support that honest assessment too. If it does not need work, you should be told that plainly.

    Why Remote Owners Need Visual Proof

    Many Gorge-area cabins, short-term rentals, and second homes sit vacant between visits. That is part of the appeal of owning a place here, but it also creates a blind spot. A windstorm can lift metal roofing at a ridge. A branch can damage a shingle slope. Ice can open a gutter seam. By the time an owner drives in, a small opening may have already wet insulation, framing, or drywall.

    For remote owners, photo documentation closes the gap between the property and the person responsible for it. You do not have to guess whether a tarp was installed correctly before the next storm. You do not have to wonder whether the repair crew found a real source of water or just treated the stain inside. You can see the condition, approve a next step with better information, and keep the images with your property records.

    That is particularly valuable for short-term rental hosts. A guest may report a ceiling drip, a wet window sill, or water near an exterior door on a Friday evening. The immediate job is protecting the guest and stopping additional damage. But the photos also let the owner understand the repair without relying on secondhand descriptions during a busy turnover weekend.

    Photos Keep Repairs Focused on the Actual Problem

    A roof leak is not always a roof replacement problem. Water often gets in at the places where materials meet: chimney flashing, wall flashing, pipe boots, valleys, roof-to-wall transitions, skylight edges, or fasteners on a metal panel. Finding the actual source takes inspection, not guesswork.

    Photos help keep that inspection honest. They make it easier to explain the difference between a limited flashing repair and a roof that is truly at the end of its service life. They also give an owner a basis for comparing recommendations. A contractor who can point to failed sealant, a lifted shingle tab, cracked mastic around a vent, or a deteriorated membrane seam is giving you something concrete to evaluate.

    There are limits, of course. A photo cannot always reveal every hidden problem. Water can travel along decking, framing, or insulation before it becomes visible inside. A roof may need a closer hands-on check, moisture testing, or selective removal of damaged material before the full extent is known. But documentation still creates a clean starting point: this is what we could see, this is what we repaired, and this is what may need watching.

    The Before-and-After Record Matters Later

    Property problems rarely arrive one at a time. A cabin that has seen storm damage, a long period of leaf buildup, and one overlooked gutter issue can develop several small repairs across different seasons. Without records, every new service visit starts with the same questions: Was this stain here before? Was that flashing repaired? Did the gutter already have a low spot? When was this section of siding patched?

    A dated photo record answers those questions faster. It helps establish maintenance history for future planning, insurance conversations, guest-damage disputes, and handoffs between property managers. If you sell the property, a history of documented maintenance can also show that you addressed issues instead of letting them sit and spread.

    Photos are especially useful after emergency work. A tarp-up is meant to stop immediate water intrusion, not serve as a permanent repair. Before-and-after images can show the storm damage, the temporary protection in place, and the area that needs permanent correction when weather allows. That is a much better record than trying to remember what happened months later.

    What Owners Should Ask to Receive

    You do not need a long report full of technical language to get useful documentation. You do need enough information to make a sound decision. Ask for photos that identify the affected area and show the condition before and after work. If a repair is recommended, ask what failed, what will be repaired, and whether there are nearby areas worth monitoring.

    For a larger issue, it helps to receive a few different views: a wider shot for location, a close-up for the defect, and a final shot after the repair. A photo of a repaired chimney flashing detail means more when you can also see which side of the chimney it is on. A close-up of a patched flat-roof seam is more useful when paired with a broader view of the drainage area around it.

    Keep the photos with invoices, estimates, and any notes about weather events or tenant reports. A simple folder organized by year and property can save time when a question comes up later. For owners with multiple cabins, rentals, or commercial buildings, that habit becomes even more valuable.

    When Documentation Is Most Valuable

    Photo documentation should be standard for repair work, but a few situations make it especially important:

    • After wind, hail, falling-limb, or heavy-rain damage
    • Before and after leak repairs, chimney work, and flashing repairs
    • During cabin inspections after long vacancies or winter weather
    • When gutters, valleys, or drainage areas are causing water problems
    • Before guest arrivals when a short-term rental needs a fast repair
    • When tracking recurring trouble around a flat roof, metal roof, or older roof section

    Valleys full of leaves are how cabin roofs die. The debris holds moisture, slows drainage, and gives water time to work under materials that may otherwise have held up for years. Photos of those conditions help an owner see why routine cleaning is not cosmetic work.

    A Better Way to Manage Property From a Distance

    Central Property Services uses before-and-after photos because property owners deserve more than a text saying, “All set.” A fast local response matters when rain is coming or guests are checking in. So does knowing what was done once the truck leaves.

    The right inspection record creates accountability without making a simple repair complicated. It gives you a straight answer about what is wrong, documents the work that protects the building, and helps you make the next decision before a small issue turns into rot, interior damage, lost rental income, or a much larger bill.

    If someone is looking after your roof, gutters, siding, or drainage while you are away, ask to see the work. Your property should not be a mystery after the repair is complete.
  • Vacation Rental Turnover Repairs That Protect Bookings

    Vacation Rental Turnover Repairs That Protect Bookings

    A guest checks out at 10:00 a.m. The next one is coming through the door at 4:00 p.m. Somewhere between stripped beds, a cleaning crew, and a fresh set of towels, somebody finds water under the kitchen sink, a loose porch rail, or a bedroom window that will not lock. Vacation rental turnover repairs are what keep a small problem from becoming a canceled reservation, a refund request, or a one-star review.

    For Red River Gorge cabin owners, turnovers are not just housekeeping days. They are inspection days. Cabins take a beating from wet weather, heavy guest use, gravel roads, falling limbs, wildlife, and long stretches when the owner is hours away. The fix is not to panic over every scuff or call for a full replacement whenever something breaks. It is to spot the problems that matter, make the right repair fast, and document what was done.

    What counts as a turnover repair?

    A turnover repair is any work needed between guests to restore a rental to a safe, functional, guest-ready condition. Some are simple: tightening a loose cabinet pull, replacing a missing smoke detector battery, or adjusting a sticking interior door. Others need a skilled hand right away, especially when water, electricity, exterior access, or structural wood is involved.

    The repairs that deserve the fastest response are the ones guests will notice immediately or that can get worse by the hour. A dripping toilet can damage a bathroom floor. A roof leak can soak insulation and stain the ceiling before the next check-in. A broken handrail, loose deck board, or failed exterior light is not just an inconvenience. It is a safety concern.

    For remote owners, the hard part is often not knowing what is really happening. A text saying, “There is a leak,” does not tell you whether a supply line is dripping under a sink, rain is coming through flashing, or condensation is running from an HVAC line. Clear photos and an honest diagnosis matter. They prevent the expensive mistake of repairing the wrong thing.

    Build turnover repairs into the inspection routine

    Cleaning crews see more than most people realize. They notice damp spots, damaged trim, odd smells, missing items, and doors that no longer latch. Give your cleaner a straightforward reporting process: photos first, a short description of the location, and a call for anything involving water, power, safety, pests, or exterior damage.

    A quick walk-through should cover the areas that cost the most when they fail. Check beneath sinks, around toilets, near the water heater, and below windows. Look up at ceilings for fresh rings or stains. Open and lock doors and windows. Test exterior lights, porch rails, deck boards, and steps. If your cabin has a fireplace or wood stove, inspect the hearth area and make sure no guest has left ash, debris, or heat damage where it does not belong.

    Outside, look at the roofline and gutters whenever possible. Valleys full of leaves are how cabin roofs die. Water backs up, finds a weak spot around flashing or shingles, and starts working on the wood beneath. A turnover crew may not need to climb a roof, but they can flag overflowing gutters, wind-blown metal, missing shingles, limb damage, or water running where it should not.

    Sort repairs by urgency, not annoyance

    Not every issue needs a same-day emergency dispatch. A scratched wall can wait for a slower maintenance day. A missing blind slat may be annoying, but it probably will not stop a check-in. Water intrusion, exposed wiring, a gas smell, broken locks, damaged stairs, and roof damage are different. Those deserve immediate action.

    A useful way to make the call is to ask three questions. Can this hurt a guest? Can it damage the property before tomorrow? Will it prevent the next guest from using the home as advertised? If the answer is yes to any of them, treat it as a priority repair.

    There is still a trade-off. Sending someone out after every minor report can burn through your maintenance budget. Ignoring small warning signs can turn cheap work into major carpentry, flooring, or roof repairs. The answer is a trusted local repair partner who can give you a straight answer about what needs attention now, what can wait, and what should be watched.

    The repairs that protect rental income

    Water is the big one. It is quiet at first, then expensive. A loose supply valve, failed toilet seal, cracked caulk line, leaking dishwasher connection, or roof penetration can all put water where it does not belong. By the time a guest smells mildew or sees a ceiling stain, the leak may have been working for weeks.

    Roof and gutter issues are especially common around the Gorge. Cabin roofs deal with hard rain, wind, branches, pine needles, and shade that keeps materials damp. Flashing around chimneys, vents, skylights, and roof transitions is often where trouble begins. The best repair is usually targeted: find the entry point, repair the flashing or damaged roofing, dry in the area if needed, and check for wet wood or rot. A repair-first approach protects your budget when a full roof replacement is not warranted.

    Decks and porches are another turnover trouble spot. Guests drag luggage, move chairs, lean on railings, and use outdoor spaces in all kinds of weather. Watch for soft boards, raised fasteners, loose rails, rotting posts, and steps that shift underfoot. The wood the weather gets to first is usually the wood that needs attention first.

    Then there are the guest-facing details: torn screens, broken locks, sagging gates, loose toilet seats, damaged blinds, sticking doors, and failed exterior fixtures. These may not be major construction problems, but they shape the guest’s first impression. A cabin that feels neglected can produce a poor review even if the beds are clean and the view is perfect.

    Why photo documentation matters for remote owners

    If you live in Louisville, Lexington, Cincinnati, or out of state, you should not have to guess whether a repair was completed correctly. Before-and-after photos give you a record of the problem, the repair area, and the finished result. They also help you make better decisions over time.

    For example, a photo of a small roof leak around pipe flashing tells a different story than a photo of widespread shingle damage or rotten roof decking. One may call for a focused repair. The other may need a larger conversation. Either way, you get facts instead of vague reassurance.

    Documentation also helps when cleaners, guests, property managers, and owners are all involved. If a guest reports a damaged door after checkout, photos establish its condition before the next arrival. If a storm tears loose guttering, photos show why it needed prompt work. That kind of accountability keeps confusion from becoming conflict.

    Prevent the emergency call before it starts

    The best turnover repair program includes maintenance between emergencies. Gutters need cleaning before they overflow. Caulk and flashing need attention before rain gets behind them. Deck boards need repair before somebody steps through a soft spot. Cabins that sit vacant between bookings need periodic checks, especially after storms or freezing weather.

    Seasonal work is not glamorous, but it protects bookings. Before winter, inspect exposed pipes, hose connections, drafty doors, roof penetrations, and gutters. After heavy wind or rain, check the roof, siding, screens, decks, and drainage paths. If water is running toward the foundation or pooling beside the cabin, deal with it before it creates a bigger moisture problem.

    It also helps to keep a short property file with paint colors, fixture sizes, lock codes, utility shutoffs, appliance information, and a list of recurring trouble spots. A local repair crew can move faster when they know where the water shutoff is, which porch light is hard to reach, or where the roof has leaked before.

    Choose a repair partner who understands the deadline

    Turnover work is different from a general home repair call. The clock is real. You need someone who understands that a Friday leak before a sold-out weekend cannot sit until next week. You also need someone who will not turn every loose shingle or small rot repair into a high-pressure replacement pitch.

    Central Property Services works with cabin and short-term rental owners across the Red River Gorge area on the roof leaks, gutter failures, carpentry repairs, drainage problems, siding patches, and weather damage that threaten a guest-ready property. The goal is simple: assess the actual issue, protect the building, make the repair that makes sense, and provide photos so you know where your money went.

    A turnover will always uncover something eventually. That is part of owning a rental. The owners who protect their revenue are not the ones who never have repair needs. They are the ones who respond early, fix the source instead of the symptom, and keep a reliable local set of eyes on the property.

  • Downspout Drainage Repair Kentucky That Works

    Downspout Drainage Repair Kentucky That Works

    A downspout that dumps water beside the house is not doing its job. Downspout drainage repair Kentucky property owners need is about getting roof runoff safely away from the foundation, crawl space, siding, and the wood the weather gets to first. In the Red River Gorge region, steep terrain, hard rain, leaf-heavy woods, and cabins that sit empty for days can turn one bad downspout into rot, erosion, or a wet basement fast.

    The good news is that many drainage problems can be repaired without tearing up the entire yard or replacing every gutter. The right fix depends on where the water starts, where it is landing, and whether the ground can carry it away.

    What a Failed Downspout Looks Like

    Some drainage failures are obvious. Water pours over the gutter edge during a storm, a downspout has come loose from the wall, or the bottom elbow is crushed. Others show up farther down the line: mulch washed out of a bed, mud splashed up the siding, a trench cut through the yard, or a damp smell in the crawl space.

    At cabins and rental properties, owners often first hear about the problem from a guest. There may be water dripping onto a porch entry, a puddle near the steps, or a wet spot under a window after a heavy rain. That is worth checking quickly. Water near the structure rarely stays a small problem when it keeps happening.

    Look for these warning signs after a storm:

    • Water standing against the foundation or below the deck
    • Downspouts that end less than a few feet from the building
    • Gutters overflowing even though the downspout appears connected
    • Loose brackets, split seams, crushed elbows, or disconnected extensions
    • Soil erosion, exposed roots, washed-out gravel, or peeling siding paint
    • Damp crawl spaces, basement seepage, mildew, or soft wood around lower walls

    A gutter can be clean and still drain poorly. A downspout can be clear at the top but clogged in an elbow, packed with wet leaves at the outlet, or connected to an underground line that has collapsed. That is why a good repair starts with following the path of the water instead of guessing from the ground.

    Downspout Drainage Repair Kentucky Properties Often Need

    The first repair may be as simple as reconnecting a loose section, replacing a damaged elbow, or securing the downspout with proper straps. If water is shooting out at a joint, leaking seams can be sealed or the failed section can be replaced. These are small repairs, but they matter because a steady leak against siding or trim can create hidden rot.

    Clogs are another common issue. Leaves, shingle grit, pine needles, and roof moss wash into the gutter system. Valleys full of leaves are how cabin roofs die, and the same debris can choke a downspout until water has nowhere to go except over the gutter. Cleaning the gutter is only part of the job. The downspout needs to be flushed and checked all the way to the discharge point.

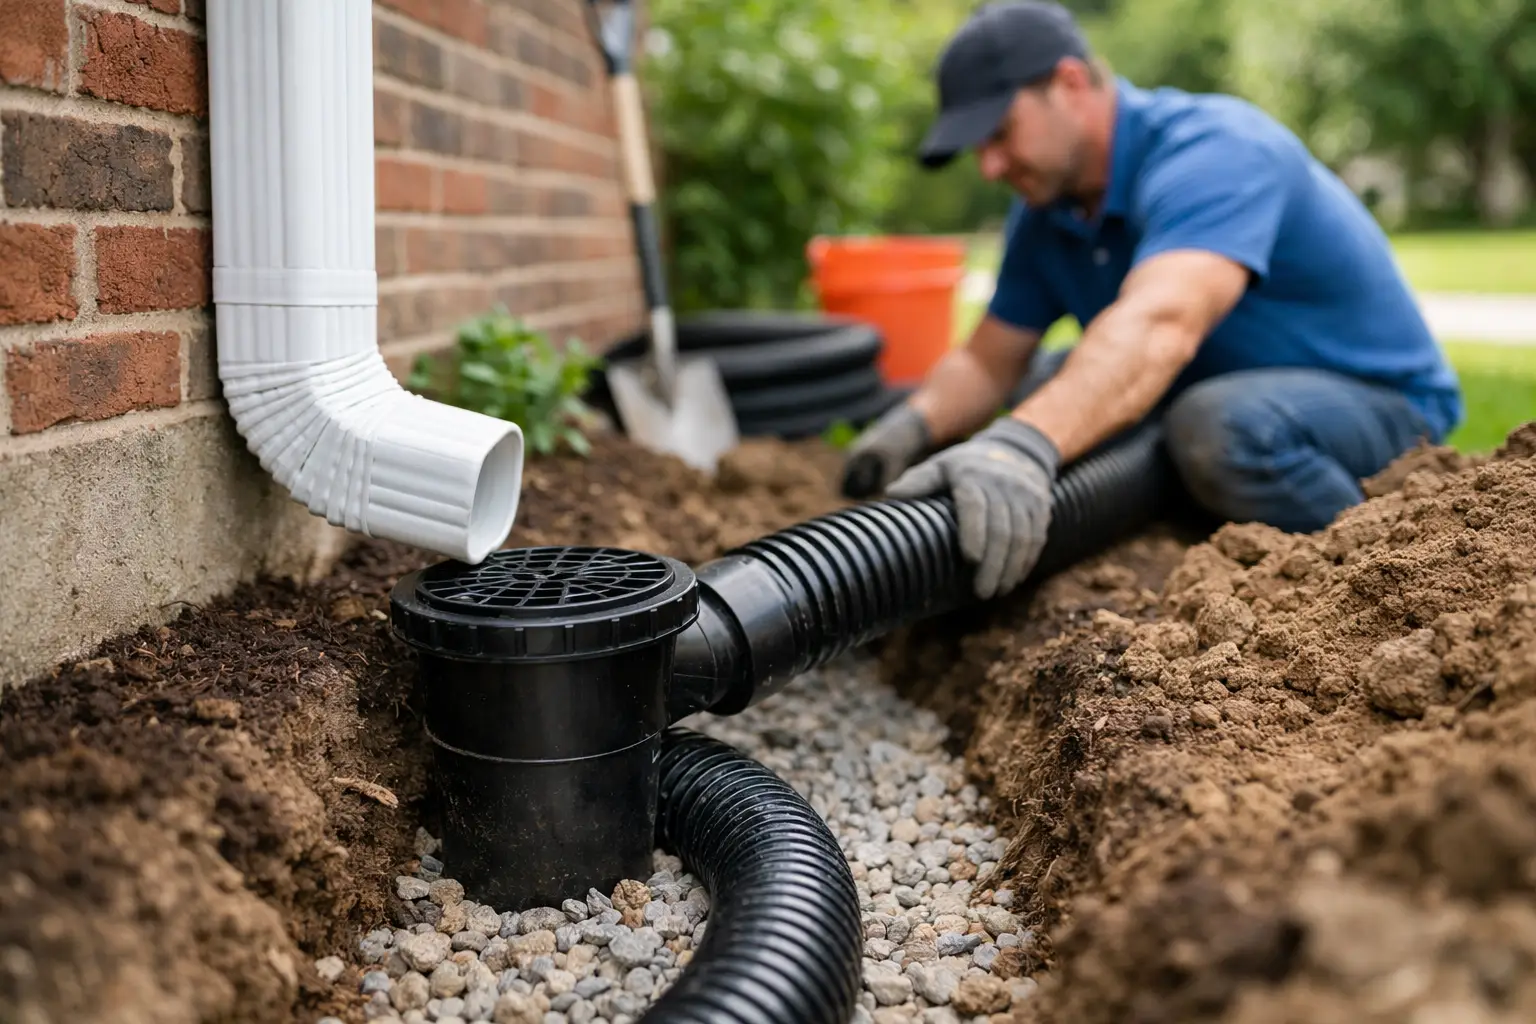
    For many homes, the bigger issue is discharge distance. Water should not stop at the foundation line. A properly placed extension, splash block, or above-ground drain route can move runoff farther into a stable area of the yard. On a sloped lot, the outlet needs to be aimed where it will not cut a channel downhill, soak a driveway, or send water toward a neighbor’s property.

    Underground drain lines can be a clean-looking option, especially around porches, walkways, and rental cabins. But buried pipe is not automatically better. It can fill with sediment, freeze, separate at fittings, or collapse if it was installed too shallow or without enough slope. Before replacing buried drainage, the line should be inspected for blockage, damage, and a usable outlet. A pipe that carries water underground only to release it against the foundation is not a repair.

    Why Kentucky Terrain Changes the Fix

    Flat suburban lots and wooded mountain properties do not drain the same way. Around Beattyville, Slade, Campton, Stanton, and the surrounding counties, many properties sit on hillsides, near rock shelves, or in soil that gets saturated during long rain events. Water moves fast until it finds a low spot, then it stays there.

    That makes simple extensions useful in some locations and risky in others. Sending water ten feet downhill may be enough for one house. At another cabin, it may wash out a path, undermine a retaining edge, or create a slick spot where guests park. Drainage repairs should protect both the building and the way people use the property.

    Roofs also matter. Metal roofs shed water quickly and can overwhelm undersized gutters or short downspouts during a hard rain. Large cabin roof planes do the same. If a single downspout handles too much runoff, adding capacity or correcting the gutter layout may be more effective than repeatedly repairing the same washed-out area below.

    Trees add another layer. Leaves and twigs are part of life in the Gorge, not a one-time fall cleanup issue. Heavy canopy means gutters and outlets may need seasonal attention, especially before winter and before the spring rain cycle. Deferred maintenance is cheaper until water gets into wood framing, crawl spaces, or guest areas. Then it is not deferred maintenance anymore. It is damage control.

    Repair First, Then Improve the Drainage Path

    A straight answer begins with finding the actual failure. If the downspout is disconnected, repair it. If the gutter is pitched wrong or clogged, correct that first. If the outlet is too close to the house, extend it to a stable discharge area. Full replacement is not the answer every time, and neither is burying pipe just because it looks tidier.

    For a remote cabin owner, documentation matters as much as the repair. You should be able to see the loose section, clogged outlet, washed-out ground, or failed connection before work starts. After the repair, you should be able to see where the water will now go. Central Property Services provides before-and-after photos so owners who live hours away are not left wondering whether the problem was actually handled.

    There are times when drainage repair needs to be coordinated with other work. Rotten fascia can prevent a gutter from staying secure. Damaged siding may need a patch where overflow has been hitting for years. A roof valley that constantly sheds debris into one gutter may need cleaning and maintenance before any downspout fix will hold up. Treating one part while ignoring the source is how the same call comes back after the next storm.

    When to Call Before the Next Rain

    Call or text for an inspection when you see foundation pooling, washouts, gutter overflow, basement moisture, or a downspout that has separated from the building. It is also smart to act before a busy rental weekend if water is crossing a walkway, pouring onto a deck, or creating mud near the entry. Guests notice drainage problems quickly, and wet steps are more than an appearance issue.

    Emergency attention is especially warranted after high wind or a storm that tears gutters loose. A hanging gutter can pull on fascia boards, and a detached downspout can concentrate roof runoff in one damaging spot. A temporary redirect may protect the property until a permanent repair can be completed.

    For commercial buildings, churches, multi-unit rentals, and properties with several structures, drainage should be checked as a system. One blocked leader can overload a roof edge, while a failed underground drain can send water into a walkway or parking area. Regular maintenance is usually less disruptive than waiting for a storm to expose every weak point at once.

    Water always takes the easiest route. The job is to make sure that route leads away from your foundation, away from vulnerable wood, and away from the places people walk. A small downspout repair completed before the next hard Kentucky rain can save a cabin, home, or rental property from a much bigger repair later.

  • Gutter Guard Installation in Kentucky: What Works

    Gutter Guard Installation in Kentucky: What Works

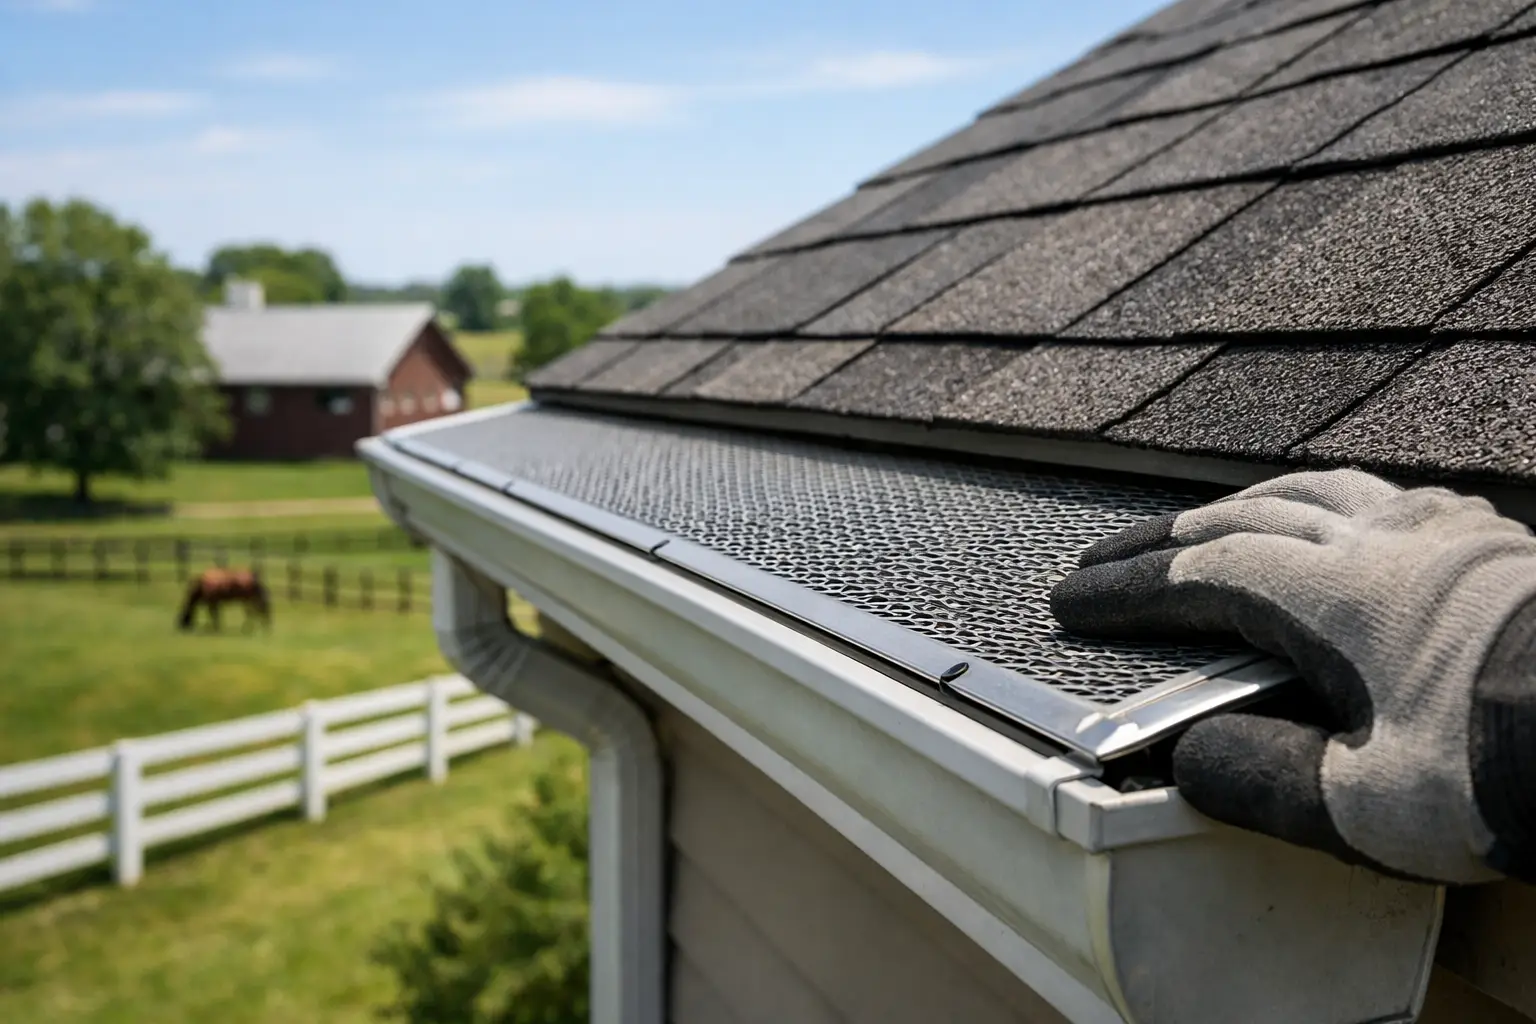
    A gutter guard is not a cure for a bad gutter system. Around the Red River Gorge, that distinction matters. Gutter guard installation Kentucky property owners choose can cut down on leaf cleanup, but it cannot correct gutters pulling off rotten fascia, downspouts that dump water at the foundation, or valleys already packed with wet leaves.

    For a home in town, missed gutter maintenance can turn into peeling paint and a soggy crawl space. For a cabin outside Slade, Campton, or Beattyville, it can become a roof leak, soft soffit, and a repair bill that grows while the owner is hours away. The right guard can help protect the property. The wrong guard, installed over existing problems, can hide trouble until the wood the weather gets to first starts failing.

    What Gutter Guards Actually Do

    Gutter guards sit over or inside the gutter channel to limit how much debris enters. Their main job is to keep leaves, twigs, acorns, and roof debris from collecting in a solid mat that blocks water flow. When gutters flow freely, rainwater reaches the downspouts instead of pouring over the edge or backing up toward the roofline.

    That is especially useful in eastern Kentucky. Our hillsides and woods are hard on gutters. Oak leaves, maple leaves, pine needles, seed pods, shingle grit, and storm-broken sticks do not arrive one at a time. A heavy rain can move all of it at once, and the low point in a gutter run is where it settles.

    Still, guards reduce maintenance. They do not eliminate it. Fine debris can collect on top of a screen. Pollen and shingle grit can work through openings. Wet leaves may bridge across certain styles, letting water run over rather than into the gutter. A guard system should make cleaning less frequent and less hazardous, not give anyone permission to forget the gutters exist for five years.

    Start With the Gutter, Not the Guard

    Before gutter guard installation in Kentucky, inspect the whole drainage path. This is the repair-first part that gets skipped when somebody is focused only on selling a product.

    The gutters need proper pitch so water moves toward the downspouts. Hangers need to be secure. Seams, end caps, and corners need to be sealed. Downspouts need to be open and directed away from the foundation. Just as important, the fascia board behind the gutter must be solid enough to hold the system.

    If a gutter is sagging, it may simply need new hidden hangers. If the fascia is soft or rotten, the repair goes deeper. Fastening a new guard to failing wood does not protect the home. It puts a clean-looking cover over a problem that will keep getting worse.

    Roof edges deserve a close look too. Water should move off the roofing and into the gutter without slipping behind it. Missing or poorly placed drip edge can send water onto the fascia. On cabins with metal roofs, snow and fast runoff can place extra strain on gutter sections and guards. The right approach depends on the roof design, slope, tree cover, and how the existing gutter system is attached.

    Which Guard Style Fits Your Property?

    There is no single best gutter guard for every Kentucky home or cabin. The right choice depends on the debris around the property and whether the gutter itself is in good shape.

    Mesh guards

    Fine stainless or aluminum mesh guards are common because they block smaller debris while allowing water through. They are often a strong fit under hardwood trees, where leaves break down into smaller pieces after repeated storms. Quality mesh can also handle a good amount of rain, but it still needs occasional surface cleaning, especially where pine needles and shingle grit are heavy.

    Screen guards

    Screen-style guards have larger openings and are usually more affordable. They can work well on a property with light leaf cover and easy roof access. Their limitation is simple: smaller debris gets through more easily, and cheaper screens can shift, bend, or become brittle over time.

    Surface-tension or hooded guards

    These systems use a curved cover to guide water into a narrow opening while debris slides off the edge. They can be effective in the right installation, but performance depends heavily on roof pitch, rainfall volume, and correct placement. During Kentucky downpours, a poorly matched hood can overshoot water right over the gutter.

    Foam inserts and brush inserts

    Foam and brush products are quick to place inside a gutter, but they are often not the best long-term answer in wooded areas. Debris can settle into them, and cleaning means removing the material rather than simply clearing a gutter channel. They may have a place as a temporary option, but property owners should understand the maintenance trade-off before choosing them.

    The best system is usually the one that fits the roof edge, handles the debris you actually have, and can be serviced without creating a new headache.

    Watch for These Problems Before Installation

    A guard installation is a good time to catch small failures before they become roof or rot repairs. Look for water stains on soffits, dark streaks on fascia, loose gutter spikes, rusted seams, standing water in the trough, and downspouts that discharge right beside the foundation.

    Pay attention to roof valleys. Valleys full of leaves are how cabin roofs die. Water and debris collect there, then spill onto one short section of gutter with far more force than the rest of the system sees. A guard may help, but a valley that regularly sends piles of wet debris downhill may also need routine roof clearing.

    For rental cabins and short-term rentals, timing matters as much as the product. A guest arriving Friday does not care that a gutter repair was planned for next month. Overflowing gutters can splash entryways, soak deck areas, stain siding, and create a bad first impression. If a storm exposes a problem, a fast local inspection and photo documentation give remote owners a clear picture of what needs attention.

    Installation Details That Make a Difference

    Good gutter guard installation is not just laying material across a gutter. Guards should be secured so wind cannot lift them, but they also should not interfere with shingles, flashing, or the roof’s drainage edge. Driving fasteners through vulnerable roofing areas can create a leak path if the work is not thought through.

    The installer should make sure each downspout is flowing before the guard goes on. There is little value in keeping leaves out of a gutter that is already blocked ten feet below. Extensions, splash blocks, underground drains, and the grade around the building should be considered as part of the same water-management problem.

    On older cabins, it may make more sense to repair a few sections, replace damaged fascia, and rehang gutters before adding guards. On a newer home with solid gutters and a heavy tree canopy, guards may be a smart preventive upgrade right away. That is why an honest site assessment beats a one-size-fits-all quote.

    How Often Do Guarded Gutters Need Service?

    Most guarded gutter systems should be checked at least once a year. Properties under dense trees often need a spring check and a fall check, plus an inspection after a major windstorm. A cabin left empty for long stretches deserves extra attention because nobody is there to notice water pouring over a clogged corner.

    The inspection does not have to turn into a major job every time. It may involve brushing debris off the guard surface, clearing valley buildup, flushing downspouts, resealing a small seam, or tightening a loose hanger. Those small corrections are cheaper than waiting for overflow to rot the fascia or find its way behind siding.

    Central Property Services approaches gutters the same way it approaches roofs: find the actual source of the problem, repair what needs repair, and document the work with before-and-after photos. If a guard makes sense, it should be part of a drainage plan that protects the roofline, walls, foundation, and the property value you worked hard to build.

    The useful question is not, “Can gutter guards stop every problem?” They cannot. Ask whether your gutters are currently carrying water where it belongs, whether the wood behind them is sound, and whether a guard will make regular maintenance more manageable. Get those answers right, and the next hard Kentucky rain has fewer places to do damage.

  • Gutter Cleaning Cabin Rentals Need Before Rain

    Gutter Cleaning Cabin Rentals Need Before Rain

    A clogged gutter can turn into a canceled booking

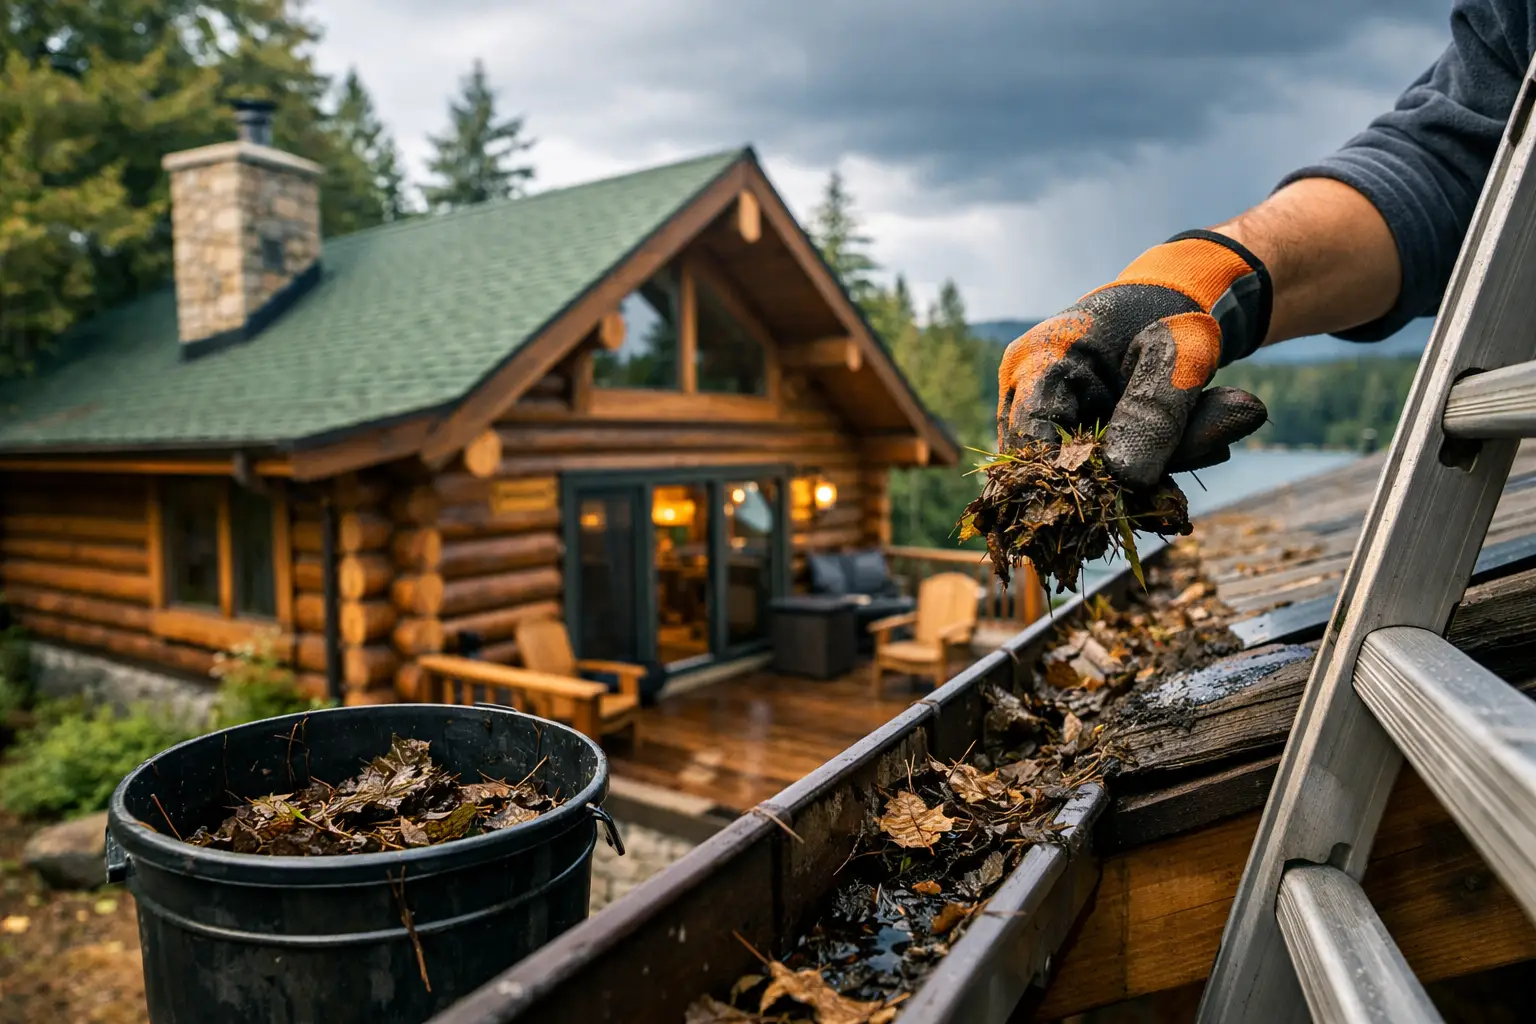
    The gutter cleaning cabin rentals need in the Red River Gorge is not a quick cosmetic chore. A few wet leaves packed at the downspout can send water over the gutter edge, down the siding, behind trim, and into the wood your guests never see. By the time a host notices a stain on the ceiling or a soft spot on the deck, the water has usually been working for a while.

    That is especially true around Slade, Beattyville, Campton, and the wooded backroads where cabins sit under heavy tree cover. Valleys full of leaves are how cabin roofs die. When gutters cannot move water away from the roofline, rain backs up where shingles, flashing, fascia boards, and roof decking are already taking a beating.

    For a short-term rental owner, the problem is bigger than a dirty gutter. It can mean an emergency call between guests, a damaged exterior, a bad review, or a booking that has to be moved because part of the cabin is wet. Regular gutter service is one of the simpler ways to protect the roof, the structure, and the income the property is supposed to produce.

    Why cabin gutters clog faster than house gutters

    A cabin in town may have the same gutter system as a house, but it does not live the same life. Many rentals in this area are surrounded by oak, maple, pine, hickory, and steep wooded slopes. Leaves do not just land in the gutter during fall. Wind, summer storms, pine needles, twigs, shingle grit, and roof moss can build up across the year.

    Cabins also tend to have rooflines that make drainage less forgiving. Long runs, multiple valleys, dormers, porches, metal roof sections, and low-slope transitions all concentrate water in specific places. If a valley dumps into a gutter that is already half blocked, water has nowhere useful to go. It can overshoot the gutter, wash out landscaping, or push backward under the roof edge.

    Then there is vacancy. A primary home owner may notice an overflowing gutter during a Saturday rainstorm. A remote cabin owner may not know there is a problem until a cleaner finds wet flooring, a guest sends a photo, or a neighbor calls after seeing water pour over the front porch. That delay is where minor maintenance turns into repair work.

    Gutter cleaning for cabin rentals protects more than gutters

    A clean gutter is meant to control where roof water goes. It catches runoff, directs it through downspouts, and moves it away from the foundation and walkways. When that path fails, water starts choosing its own route.

    At the roof edge, overflowing water can soak fascia, soffit, and trim. Those are often the first boards to rot because they are the wood the weather gets to first. On cabins with stained or natural wood exteriors, damage can spread behind a good-looking surface before it becomes obvious.

    At ground level, discharged water can create muddy entry paths, splash siding, undermine gravel, and collect near crawlspaces or foundations. In winter, a bad drainage path can freeze near steps and decks. That is a safety issue for guests, not just a maintenance item.

    The roof itself is also at risk. Gutters do not usually cause a roof leak by themselves, but backed-up water exposes weak flashing, aging shingle edges, open seams, and poorly managed roof transitions. A repair-first inspection can separate a simple cleaning need from a gutter pitch problem, loose hangers, a failed downspout connection, or a roof issue that needs attention.

    How often should a rental cabin’s gutters be cleaned?

    For most wooded Red River Gorge rentals, twice a year is the minimum practical schedule: once after heavy leaf drop and once in spring after winter debris and early storms. Cabins beneath dense trees, properties with long roof valleys, and homes using gutters that clog repeatedly may need a third visit during the year.

    The right timing depends on the property. A cabin on an open ridge with limited tree cover may do fine with spring and late fall service. A rental tucked into a hollow under mature hardwoods can need attention after every major leaf season. If pine needles are involved, waiting until fall is often too long.

    A quick look from the ground helps, but it does not tell the whole story. Water can be trapped behind a visible pile of leaves, and a downspout can be blocked even when the gutter line looks clear. During a service visit, the goal should be to remove debris, clear the outlets and downspouts, and make sure water is actually traveling where it should.

    Put gutter service on the same calendar as turnover planning

    Rental owners already plan ahead for deep cleans, HVAC checks, firewood, pest control, and seasonal supplies. Gutter cleaning belongs in that same property-care calendar. Schedule it before the busy fall booking stretch and again before spring rain picks up.

    Do not wait for an overflow to make the call. By then, the gutter may be the visible part of a larger moisture problem. Planned service is usually easier to schedule and less expensive than dealing with wet trim, roof-edge rot, or a leak during a guest stay.

    What a worthwhile gutter visit should include

    A crew should not simply pull a few leaves out of the front gutter and call it finished. Cabin properties need a look at the full drainage route, especially where roof valleys drain, where gutters meet porch roofs, and where downspouts empty at the ground.

    A thorough visit generally means removing loose debris, clearing outlet openings and downspouts, checking for standing water, and looking for obvious sagging or separated sections. It should also include an eye on loose gutter hangers, leaking seams, missing end caps, and downspouts that discharge too close to the cabin.

    Photo documentation matters for remote owners. Before-and-after photos let you see the clogged areas, the cleared gutter runs, and any repair concerns without guessing from several counties away. Central Property Services provides that visual accountability because a text saying the job is done is not the same as seeing what was found and what was corrected.

    Cleaning will not fix every drainage problem

    Sometimes the debris is the whole issue. Other times, cleaning exposes why the gutter keeps failing. If water remains pooled after clearing, the gutter may be pitched incorrectly. If a section is pulling away from the fascia, the fasteners may be loose or the wood behind them may be soft. If a downspout dumps beside a foundation wall, the system may need an extension or a better drainage route.

    Gutter guards can help in the right setting, but they are not a promise of zero maintenance. Fine debris and pine needles can still sit on top of guards, and guards can make cleaning or repairs more involved. They make the most sense after the gutters are correctly installed, pitched, and repaired. Installing a guard over a failing gutter only hides the problem for a while.

    The same goes for caulk and quick patches. A small leaking seam can often be repaired. A gutter section that has lost its slope, separated from rotten fascia, or been damaged by a fallen limb may need more than sealant. An honest assessment should tell you which situation you have without using a simple gutter issue to push a full replacement.

    When to treat gutter trouble as urgent

    There are a few signs that should move gutter work to the top of the list. Water running behind the gutter, stains beneath roof edges, visible sagging, overflowing water near an entry, and downspouts that are not draining all deserve a prompt look. After a windstorm, check for branches, torn gutter sections, and damage around roof valleys and flashing.

    If there is an active roof leak, wet ceiling, or water entering near a wall, gutter cleaning alone may not be the answer. The property needs the source diagnosed quickly. Water often travels before it shows up inside, so the stain is not always directly below the failure.

    Safety matters here. Steep cabin roofs, wet decks, tall ladders, electrical lines, and uneven mountain ground are not good conditions for a homeowner or cleaner to take chances. A gutter job can become a fall risk in a hurry. If access is questionable, send someone equipped to work the property safely and inspect the roof edge while they are there.

    Keep water moving before the next guest arrives

    A cabin does not need a dramatic storm to get damaged. It just needs water held in the wrong place often enough. Clean, working gutters are a basic defense against roof-edge rot, stained siding, slick walkways, and avoidable repair calls.

    If your rental has not had its gutters checked since the last leaf drop, handle it before the next hard rain puts water where it does not belong. A few photos and a straight answer can give a remote owner the confidence to keep the property ready for guests.

  • Chimney Flashing Repair Kentucky for Roof Leaks

    Chimney Flashing Repair Kentucky for Roof Leaks

    A chimney leak rarely starts with a dramatic hole in the roof. More often, water slips through a small break where brick, metal, shingles, and old sealant meet. Then it travels. By the time a stain shows up on a ceiling or a cabin guest reports a drip, the water may have already soaked roof decking, insulation, framing, or drywall.

    That is why chimney flashing repair Kentucky property owners need should start with finding the actual entry point, not guessing and not selling a roof replacement that may not be necessary. Around Beattyville, Slade, Stanton, Campton, and the Red River Gorge, chimneys take hard rain, wind-driven storms, leaf buildup, freeze-thaw cycles, and long stretches of damp weather. The flashing is the small but critical system that keeps that water outside.

    What chimney flashing actually does

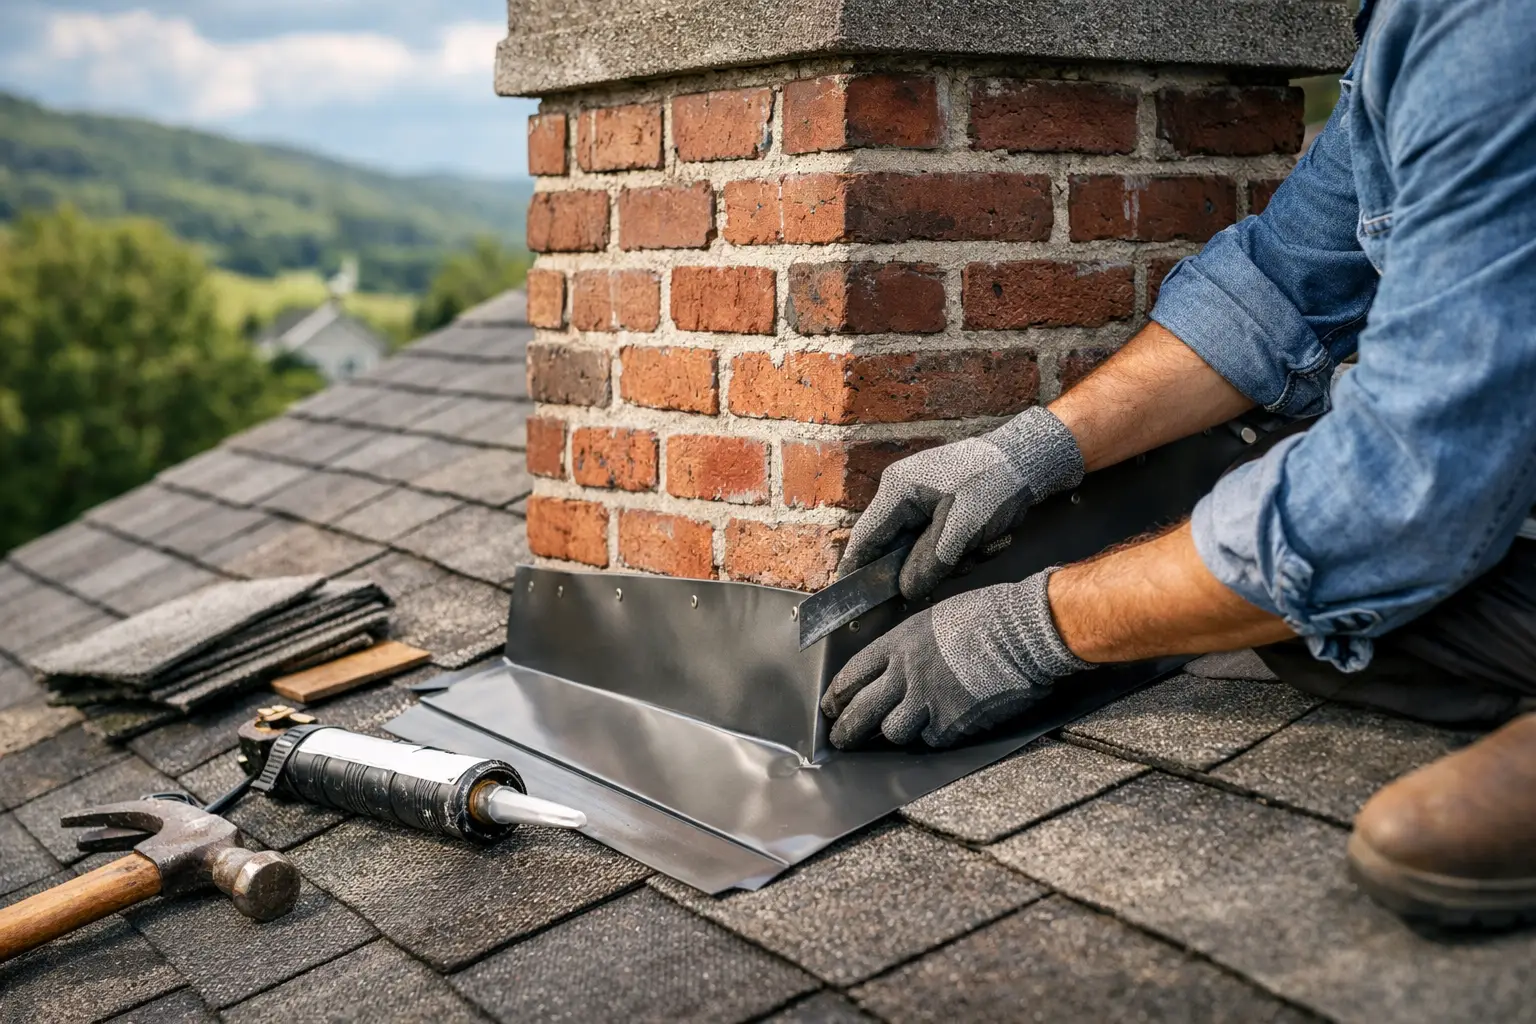
    Flashing is the material installed where a chimney meets the roof. It redirects water around the chimney and onto the shingles or metal panels below. A properly flashed chimney is not protected by a thick bead of caulk alone. It uses overlapping metal pieces, layered with the roofing so water sheds downhill instead of finding a seam.

    On many shingle roofs, that system includes step flashing along the sides, a wide back pan or cricket at the uphill side, and counterflashing set into the chimney mortar joints. The front side also needs a properly integrated flashing piece. Metal roofs have different details, but the same rule applies: every transition has to shed water, even in a hard sideways rain.

    When one piece fails, water can get behind the roof covering. That is why a chimney can leak even when the surrounding shingles look fine from the ground.

    Signs you may need chimney flashing repair in Kentucky

    A ceiling stain near the chimney is a clear warning, but it is not the only one. Look in the attic after a rain if it is safe to do so. Damp wood, darkened roof decking, wet insulation, rusted nails, or a musty smell near the chimney are all signs that water has been getting in.

    Outside, watch for loose or lifted flashing, cracked sealant, gaps at the brick, rusted metal, missing shingles around the chimney, or mortar joints that are crumbling where counterflashing should be secured. On older cabins, you may find layers of roofing cement smeared over the area. That often means someone tried to stop a leak from the surface without correcting the flashing underneath.

    Not every chimney-area leak is flashing. Cracked chimney crowns, damaged brick, failed mortar, a leaking chimney cap, or a roof valley that drains toward the chimney can cause similar symptoms. A straight answer starts with inspecting the whole area, not pointing at the first visible crack.

    Why leaks often show up after heavy rain

    A slow, steady rain tests one set of weaknesses. A thunderstorm tests another. Wind can push water uphill under lifted shingles or through a failed side seam. Heavy runoff can overwhelm a poorly detailed back pan. In winter, ice and repeated freezing can open tiny gaps in mortar and sealant.

    Kentucky cabins are especially vulnerable when a roof goes unchecked between visits. Leaves and pine needles trap moisture behind a chimney and keep the area wet longer. Valleys full of leaves are how cabin roofs die, and a backed-up chimney cricket can create the same kind of trouble.

    Repair or replacement? It depends on what failed

    Good chimney flashing repair is not one-size-fits-all. If the metal is sound and the issue is a small open joint, a targeted reseal may be appropriate. If a few shingles were damaged by wind or age, replacing those shingles and restoring the flashing layers can stop the leak without disturbing the rest of the roof.

    But surface sealant has limits. Caulk dries out, separates from brick, and fails under movement. If the flashing was installed flat against the chimney, nailed where it should not be, or buried under roofing cement, the lasting fix may require removing shingles around the chimney and rebuilding the flashing system correctly.

    For masonry chimneys, failed counterflashing can also require mortar work. The metal needs to be secured into a mortar joint or properly integrated with the masonry. Simply running sealant across the top edge may buy time, but it is usually not the repair you want protecting a home, rental cabin, or commercial building through another wet season.

    A full roof replacement makes sense when the roof itself is worn out, broadly damaged, or nearing the end of its service life. It does not make sense just because there is a leak at one chimney. Repair-first work means separating a localized flashing problem from a roof-wide problem and telling you which one you actually have.

    What a proper chimney flashing repair should address

    The repair should begin with diagnosis. A contractor needs to inspect the roof slope, shingles or metal panels, chimney masonry, nearby valleys, and the attic or interior signs of moisture when accessible. Water does not always enter directly above the stain.

    From there, the work may involve removing compromised roofing around the chimney, replacing damaged decking if water has softened it, installing new step flashing and back-pan material, and tying the roof covering back in correctly. If the chimney is wide enough, a cricket may be needed on the uphill side to split water around it instead of allowing debris and runoff to pile up.

    The final detail matters. Metal must overlap in the right direction. Shingles must shed over the flashing where intended. Fasteners need to be placed where they will not become leak points. Sealant is useful as a finishing component, not as the entire waterproofing plan.

    For remote owners, photos are not an extra. They are proof. Before-and-after documentation lets you see the damaged area, the repair in progress, and the finished flashing without driving hours to the property. Central Property Services provides photo documentation on every job because a text saying “all fixed” is not enough when the property is in the Gorge and you are somewhere else.

    Do not wait for rot to make the decision for you

    A flashing leak can stay hidden for months. Each rainfall adds a little more moisture to the same area. Eventually, the wood the weather gets to first starts to soften. Then a relatively contained repair can turn into decking replacement, framing repair, interior drywall work, mold cleanup, or a ceiling failure during a guest stay.

    For short-term rental owners, that risk is more than a repair bill. A leak can force a cancellation, damage furnishings, create a bad review, or leave a cleaner dealing with a wet ceiling hours before check-in. For homeowners, it can mean a small brown mark becomes a much larger opening once the drywall finally gives way.

    If water is actively coming in, protect the interior first. Move belongings, place containers under drips, and document what you see. Avoid climbing onto a wet roof or trying to tarp around a chimney in wind. A temporary tarp can prevent additional damage, but it needs to be installed without creating more holes or trapping water where it does not belong.

    Questions to ask before approving the work

    You do not need a roofing vocabulary lesson to make a sound decision. Ask where the water is entering, what materials have failed, and whether the repair addresses the flashing layers or only covers the area with sealant. Ask whether nearby shingles, decking, mortar, or the chimney crown show damage that affects the repair.

    For a cabin or rental property, ask for photos before work begins and after the repair is complete. Also ask what conditions could make the repair more involved once the roof is opened up. Hidden rot is possible, and an honest contractor should explain that possibility without using it as a scare tactic.
    The right fix is the one that stops water at the transition, protects the roof system around it, and fits the actual condition of the property. A chimney flashing problem is not something to ignore, but it is also not an automatic reason to replace an entire roof. Get eyes on it early, get the work documented, and keep a small leak from becoming the repair that takes over the whole house.

  • Metal Roof Leak Repair That Finds the Real Source

    Metal Roof Leak Repair That Finds the Real Source

    A drip coming through a cabin ceiling may show up ten feet from where water actually entered. That is why metal roof leak repair is not about smearing sealant over the first wet spot you find. It is about tracing water uphill, checking the details that move with heat and cold, and fixing the specific failure before wet wood, insulation, or drywall turns a small repair into a larger property problem.

    Around the Red River Gorge, roofs take a beating. Heavy rain runs hard through valleys. Wind works on exposed ridge caps and flashing. Leaves pile up behind chimneys and under low-slope transitions. A metal roof can last a long time, but its screws, seams, pipe boots, flashing, and edges still need attention. Metal itself is tough. The small parts around it are usually where the trouble starts.

    Where Metal Roof Leaks Usually Begin

    Most leaks do not come from a random hole in the center of a panel. They start at a connection, penetration, overlap, or transition where water has a path in and gravity has time to work.

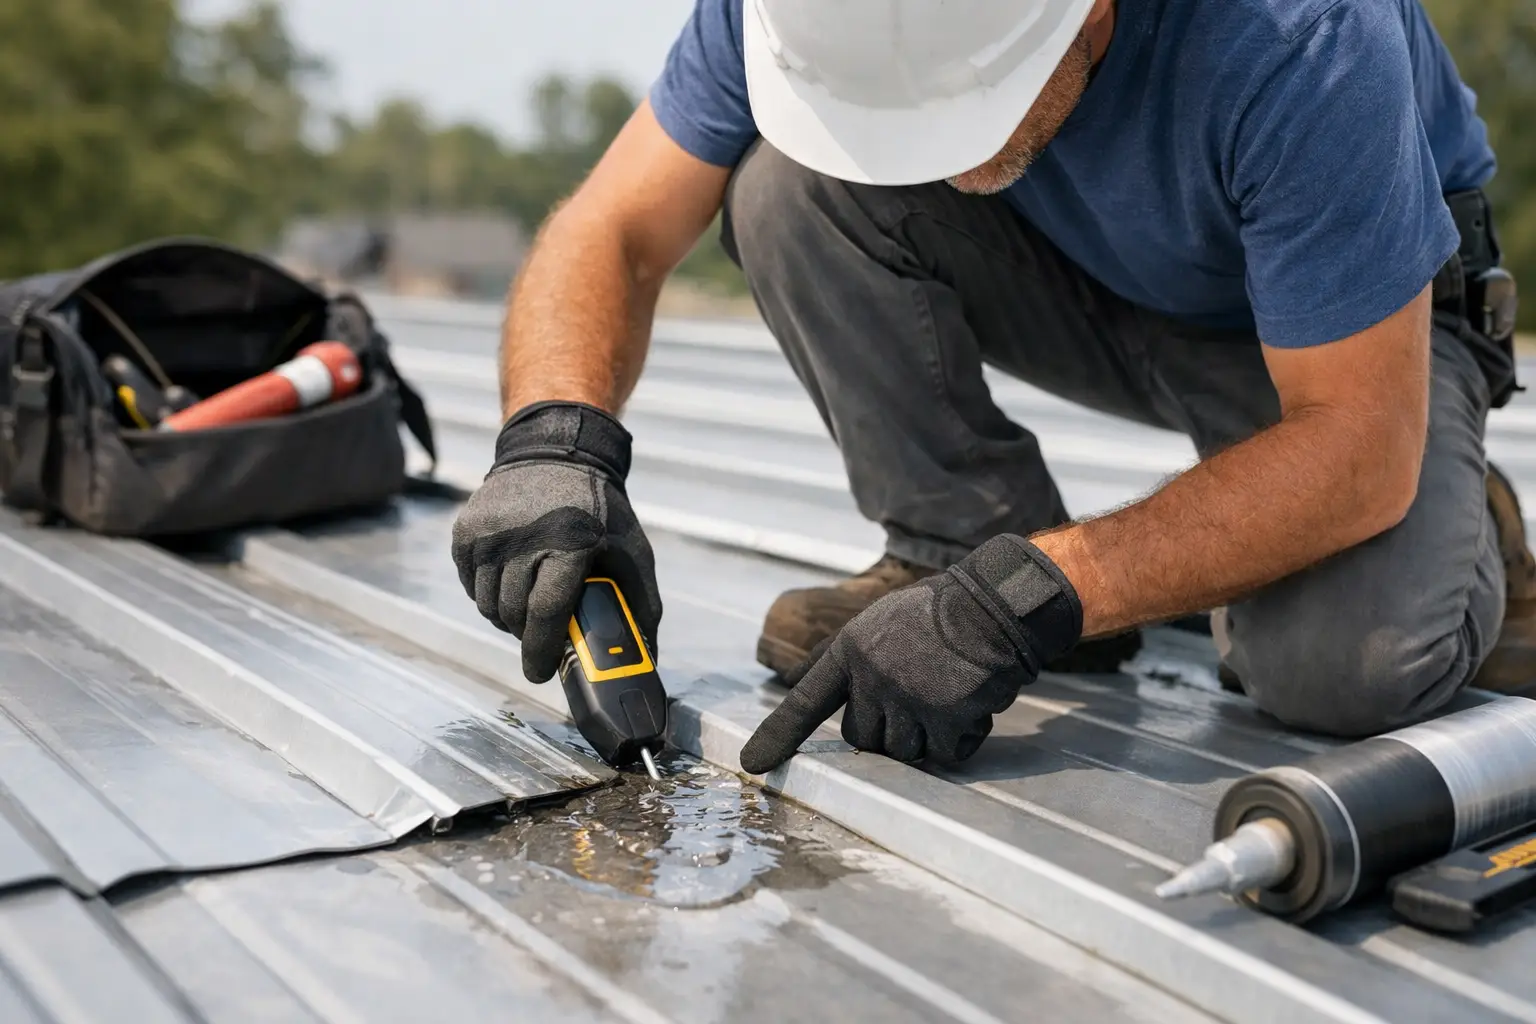
    Exposed fasteners are one of the most common causes. Screws use a rubber washer to seal against the metal. Over time, that washer can dry out, crack, compress too far, or back off as the roof expands and contracts. A screw that looks close to flush may still let water under the panel during a hard, wind-driven rain. Replacing a failed fastener with the right screw and washer is often a straightforward repair. Covering it with a blob of caulk is usually temporary at best.

    Pipe boots are another repeat offender. The rubber or neoprene collar around a plumbing vent sees direct sun, heat, cold, and constant movement. Once it splits, water follows the pipe opening straight into the attic. On a rental cabin, that can stay hidden until a guest notices a ceiling stain or a musty smell during turnover.

    Flashing deserves close attention too. Chimneys, skylights, wall intersections, dormers, and roof-to-porch transitions all interrupt the normal flow of water. If the flashing was installed poorly, bent by a branch, pulled loose by wind, or buried under leaves, water can get behind it. The leak may look like a roof-panel problem from inside, but the real source is often the detail work at the edge.

    Valleys are especially important in wooded parts of eastern Kentucky. Valleys full of leaves are how cabin roofs die. Water slows down, backs up, and stays against areas that were meant to shed it quickly. Debris also hides loose screws, rusted edges, and damaged sealant until the next downpour makes the issue obvious.

    A Metal Roof Leak Repair Starts With Diagnosis

    The right repair depends on what failed, not on what is easiest to reach. A good inspection starts inside when possible. Ceiling stains, wet insulation, rusty nail points, moldy sheathing, and water trails all help narrow down where water is traveling. Then the roof is inspected above the stain and beyond it, because water often follows rafters, purlins, or the underside of a panel before it drops.

    Rain patterns matter. Does it leak only during a driving rain from one direction? Does it show up after a slow all-day storm? Is it worse after snow, ice, or a rapid thaw? Those answers point toward different causes. A wind-driven leak may be a flashing or panel-lap issue. A leak after standing water in a valley may be debris, a failed closure, or a drainage problem. Water that appears without rain may be condensation or a plumbing issue, not a roof leak at all.

    For remote owners, photos are more than a courtesy. They help answer the question that matters: what was actually found, and what was actually fixed? Central Property Services documents repair work with before-and-after photos so cabin owners, landlords, and property managers do not have to guess from hours away.

    Do Not Assume Every Leak Requires Replacement

    A metal roof can look rough and still be repairable. Surface oxidation on an older panel, faded paint, or a handful of failed screws does not automatically mean the whole roof is done. Repair may be the sensible route when the panels are structurally sound, the damage is limited, and the roof still has good drainage and attachment.

    Replacement becomes a more realistic conversation when corrosion has eaten through panels, widespread fastener failure has opened up large sections, underlying decking is badly damaged, or the roof was installed with a design problem that keeps creating leaks. The honest answer is sometimes that a larger project is needed. But that answer should come after diagnosis, not before it.

    What a Proper Repair May Include

    Metal roof repair is rarely one-size-fits-all. A targeted job may involve replacing backed-out screws, installing new gasketed fasteners, changing a cracked pipe boot, resealing an approved metal-to-metal lap, or rebuilding flashing at a chimney or wall.

    If a panel is punctured by a limb or torn near an edge, the repair may require a fitted patch or panel replacement. The method depends on panel profile, location, roof slope, and how water runs across that area. A patch that holds on a sheltered section may fail in a valley or near a ridge where wind and water pressure are stronger.

    Some jobs also expose the need for related work. Rotten fascia, loose gutters, damaged siding, or poor drainage can keep feeding water toward the roof edge. The wood the weather gets to first is usually the wood at the eaves, behind failing gutters, or around a neglected chimney. Fixing the roof while ignoring the water path below it can leave the property vulnerable.

    What You Can Check From the Ground

    You do not need to climb onto a metal roof to recognize a problem. In fact, wet metal is slick, and even a dry roof can be unsafe without the right equipment. Start from the ground or from inside the attic if it is safely accessible.

    Watch for these signs:

    • A new ceiling stain, peeling paint, damp insulation, or a musty odor after rain.
    • Missing, lifted, or visibly crooked metal trim along a ridge, rake, or roof edge.
    • Leaves and branches packed in valleys, behind chimneys, or at gutters.
    • Rust streaks below fasteners, loose screws, cracked vent boots, or panels damaged by limbs.
    • Overflowing gutters or water washing against fascia and siding during a storm.

    Take clear photos from the ground and note when the leak happens. That information can save time during inspection, especially when a cabin is vacant and weather is changing fast.

    Stop the Water First When the Weather Will Not Cooperate

    During an active leak, property protection comes before a perfect permanent repair. Move furniture and electronics, catch interior water safely, and avoid opening ceilings unless there is an immediate reason to do so. If water is near electrical fixtures, shut off power to the affected area if it is safe and call an electrician when needed.

    A professional tarp-up or temporary dry-in can be the right move when storms are still coming, materials are not available, or the roof needs to dry before flashing and sealants can be installed correctly. A temporary fix is not a failure when it prevents further damage. It is a way to buy the property time without pretending a rushed repair will last.

    For short-term rental owners, speed matters for another reason: a small leak can become a guest issue, a canceled booking, or a ceiling repair that disrupts the next turnover. Fast dispatch and clear photo documentation let you make decisions without driving to the Gorge just to see whether the problem is real.

    Preventing the Next Leak

    The best time to find a failed washer or cracked boot is before water reaches the ceiling. Have the roof checked after major wind events, falling limbs, or long periods of heavy rain. Keep valleys, gutters, and roof-to-wall areas clear of leaf buildup. Trim branches that rub panels or hang over vulnerable areas.

    Older exposed-fastener roofs benefit from periodic inspection because fasteners age at different rates. A few replaced screws today can prevent wet decking later. If your property sits empty for part of the year, a seasonal maintenance visit is cheap insurance against discovering a leak only after weeks of rain.

    A leaking metal roof does not need a sales pitch. It needs a straight answer, a careful look at where water got in, and a repair that respects the rest of the roof. Catch it early, document the work, and keep water from getting another chance at the structure underneath.

  • Cabin Roof Repair in Red River Gorge Done Right

    Cabin Roof Repair in Red River Gorge Done Right

    A cabin roof can look fine from the driveway and still be taking on water where the weather gets to it first. In the Gorge, that usually means a leaf-packed valley, a lifted piece of flashing, a pipe boot split by sun and cold, or a metal-roof screw that has worked loose. Cabin roof repair Red River Gorge property owners need is not about selling a roof before anyone has found the leak. It starts with locating the actual failure, stopping the water, and documenting what was repaired.

    That matters even more when the cabin is a short-term rental or a second home. A small drip can stain a ceiling this weekend, soften framing over the winter, and turn into a guest cancellation when the next hard rain rolls through Slade, Campton, or Beattyville. The fastest way to control the cost is to deal with the first visible sign before water reaches insulation, drywall, wiring, or the deck beneath the roofing.

    Why Gorge Cabins Get Roof Problems Faster

    Red River Gorge cabins take a different kind of beating than a house on an open suburban lot. Many sit under heavy tree cover, on steep roads, or in hollows where roofs stay damp long after a storm. Shade keeps leaves and pine needles wet. Wet debris blocks drainage. Then water works under shingles, backs up at transitions, and sits against metal panels or flashing.

    Valleys full of leaves are how cabin roofs die. The valley is supposed to move water quickly off the roof. When it becomes a compost pile, rain has nowhere to go but sideways and underneath the roofing. A roof may not leak during a light shower, then suddenly show water after a slow, all-day rain because the backed-up water finally found an opening.

    Wind is another common problem. Ridge cabins and exposed properties around the Gorge can take hard gusts that lift shingles, loosen ridge caps, or pull flashing away from a chimney wall. Metal roofs hold up well in this region, but they are not maintenance-free. Loose fasteners, failed screw washers, open laps, and poorly sealed penetrations can leak just as surely as damaged shingles.

    The roof itself is not always the only issue. Bad gutters can overflow behind fascia, soak eaves, and cause rot in the wood the weather gets to first. A chimney chase, siding transition, skylight, or roof-to-wall connection can also be the real source of what looks like a roof leak. Good repair work follows the water path instead of guessing from the stain on the ceiling.

    Cabin Roof Repair Red River Gorge Owners Should Not Delay

    A roof leak rarely stays in one place. Water runs along rafters, framing, and electrical lines before it becomes visible inside. By the time a brown ceiling spot appears, the entry point may be several feet away. That is why a repair should begin outside with a close inspection of roof details, drainage, and all the places where one material meets another.

    Common warning signs include a ceiling stain, a musty smell, damp insulation, peeling paint near an exterior wall, or a drip that only shows up during wind-driven rain. Outside, look for granules in gutters, curled or missing shingles, exposed nail heads, rust around metal fasteners, cracked sealant, bent flashing, and moss or debris holding moisture on the roof.

    For rental owners, there is also an operational warning sign: a guest mentions a stain, mildew smell, or drip after a storm. Treat that report seriously, even if the weather has cleared and the ceiling is dry when someone arrives. The source may only reveal itself under a particular wind direction or heavy rainfall. Waiting for the next guest to confirm it can turn a manageable repair into a refund, a bad review, and a larger repair bill.

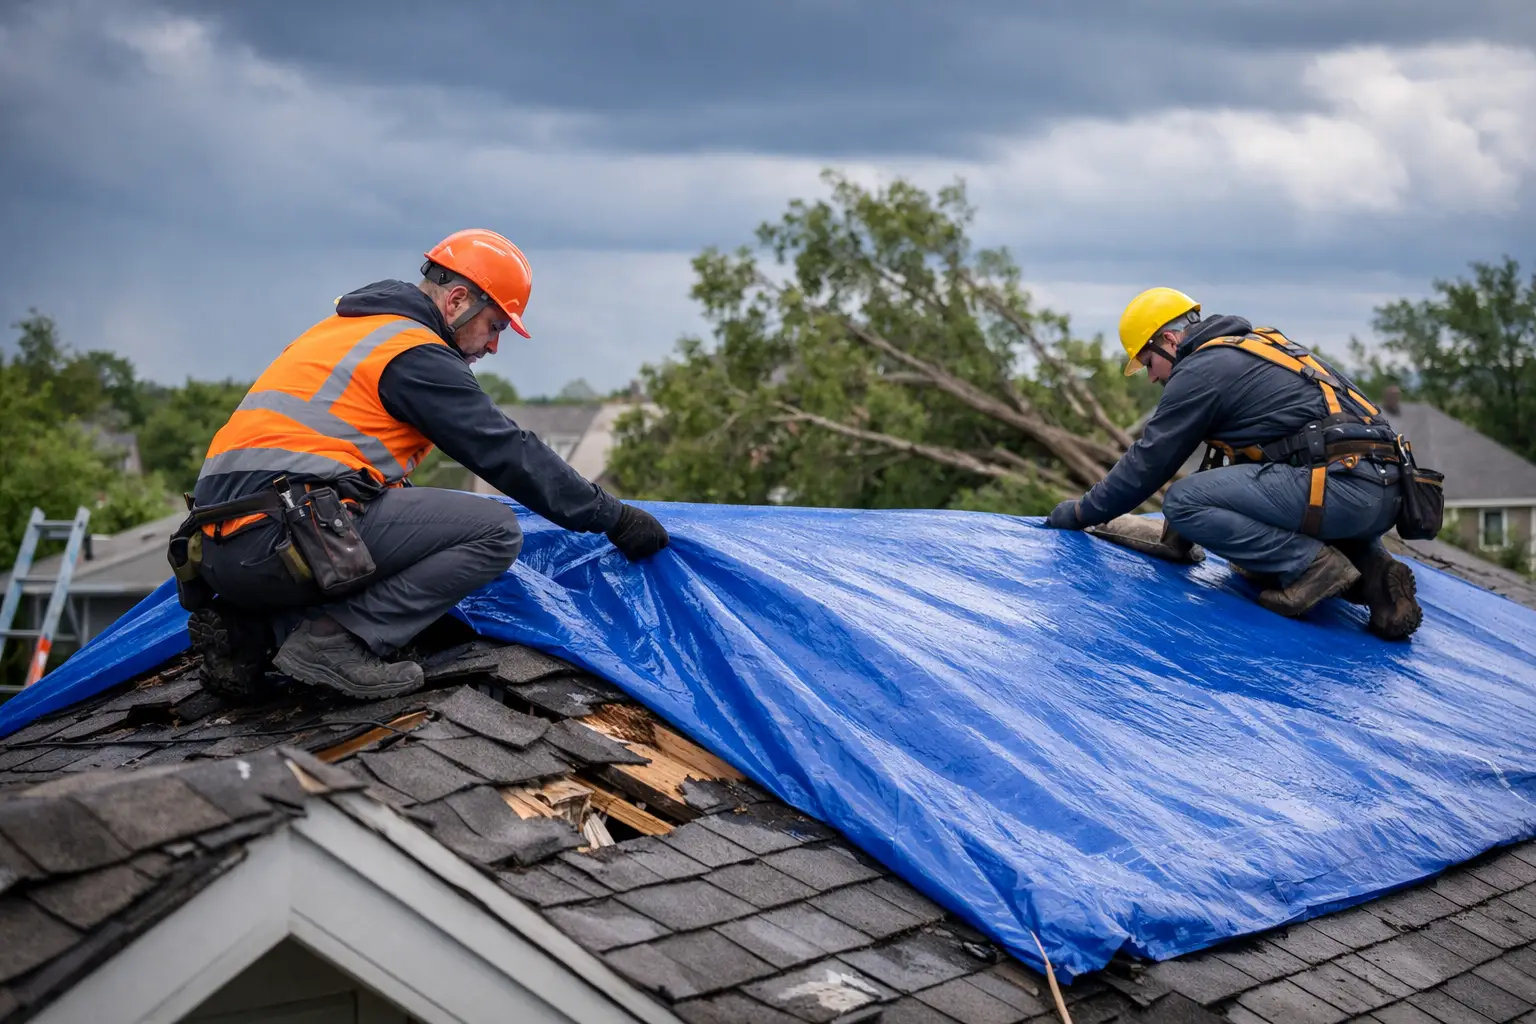
    Emergency tarp service has its place after a tree strike, wind damage, or an active opening in the roof. A tarp is a dry-in measure, not a finished roof repair. It buys time to protect the interior while the damage can be inspected safely and the right materials can be lined up. The next step is always a permanent fix that restores the roof’s water-shedding system.

    Repair First, Replacement Only When It Makes Sense

    Not every leak means the whole roof has failed. A single damaged shingle area, bad pipe boot, failed chimney flashing section, or loose metal fastener can often be repaired without replacing everything. That is especially true when the roofing field is still in sound condition and the problem is isolated.

    A repair-first approach saves money when it is honest about the limits. If the roof has widespread shingle loss, widespread rot, repeated leaks in unrelated areas, or a surface that has reached the end of its service life, patching can become false economy. The right answer depends on the roof’s age, condition, slope, material, past repairs, and how long the owner plans to hold the property.

    The key is getting a straight answer. A contractor should be able to show you the failed detail, explain why it leaked, and tell you whether the repair is meant to be a lasting correction or a short-term measure. Vague talk about “storm damage” without identifying the actual opening is not enough, especially when you are paying from out of town.

    Central Property Services approaches cabin roofing with that repair-first mindset. If a focused repair will protect the cabin, that is the work that should be recommended. If the condition points to larger planning, the owner deserves clear photos and a plain explanation, not pressure.

    What a Proper Cabin Roof Repair Visit Should Cover

    A useful inspection is more than a quick look from the ground. The roof needs to be checked at its vulnerable points: valleys, ridges, penetrations, roof edges, transitions, chimneys, skylights, and any place flashing meets siding or masonry. Gutters and downspouts should be considered too, because a functioning roof cannot drain correctly into a clogged or broken system.

    For shingle roofs, repairs may involve replacing torn or missing shingles, correcting exposed fasteners, sealing a properly prepared detail, or rebuilding damaged flashing. The repair must preserve the way water overlaps and sheds downhill. Smearing a lot of sealant over a problem can hide it temporarily, but sealant alone is not a substitute for correctly lapped materials.

    For metal roofs, the work may include replacing backed-out screws, installing new sealing washers where needed, repairing panel damage, addressing open seams, or correcting flashing at chimneys and walls. Metal expands and contracts, so details need to allow for movement without leaving a path for water.

    If water has already reached the interior, the inspection should not end on the roof. Damp insulation, stained decking, soft fascia, and wet wall materials need attention before hidden moisture becomes mold or rot. Sometimes a small roof repair prevents a large interior repair. Sometimes the roof repair exposes damage that should be handled while access is available. That is not bad news – it is the truth that keeps a cabin from quietly getting worse.

    Remote Owners Need Proof, Not Just a Text Message

    Many Red River Gorge cabin owners live hours away. They cannot always drive over after a storm, climb onto a wet roof, or verify whether a repair was completed. For those owners, before-and-after photos are part of the service, not an extra.

    Photos should show the problem area before work begins, the repair as it is performed when practical, and the completed condition afterward. They give an owner a record for maintenance planning, insurance conversations, property managers, and future contractors. They also make it easier to spot recurring trouble in the same valley, chimney, or drainage area.

    A remote owner should also know what happens next. Was the leak repaired? Was there evidence of rot? Does the gutter system need cleaning or adjustment? Is a return visit needed after weather conditions change? Clear answers help owners decide whether they need an immediate follow-up, a seasonal maintenance visit, or simply a watch point for the next storm.

    Keep Small Roof Problems From Becoming Cabin Problems

    The cheapest roof repair is often the one caught early. A spring and fall check is smart for heavily wooded properties, along with an inspection after major wind, hail, or a fallen limb. Gutters need to stay open, valleys need to stay clear, and overhanging branches should not scrape the roof or drop a constant load of debris onto it.

    Do not wait for a ceiling stain to make the call. If you see missing shingles, a loose metal panel, damaged flashing, overflowing gutters, or debris piled in a valley, the roof is already telling you where to look. Handle it while the repair is still focused, the cabin is protected, and your next rainstorm is just weather instead of a test of your property.

    Log cabin under tree cover in a wooded hollow
    Tree cover is shade in July and a roof problem by November
  • Storm Damage Roof Dry In: What to Do First

    Storm Damage Roof Dry In: What to Do First

    A storm damage roof dry in is not a cosmetic fix. It is the work that keeps rain from turning a missing shingle, lifted metal panel, or punctured roof into wet insulation, ceiling stains, mold, and rotten framing. After a hard wind or hailstorm in the Red River Gorge, the first job is simple: stop the weather from getting any farther into the building.

    For homeowners, cabin owners, and remote rental hosts, that first layer of protection can make the difference between a manageable repair and a claim that keeps growing. If water is actively coming in, do not wait for a full replacement decision. Get the roof protected, document the damage, and then determine what actually needs repair.

    What a Storm Damage Roof Dry In Actually Does

    A roof dry-in is temporary weather protection installed after storm damage. Depending on the roof and the damage, that may mean a secured tarp, self-adhered waterproof underlayment, synthetic underlayment, or a combination of materials. The purpose is to shed water until permanent repairs can be made safely and correctly.

    A tarp is often the fastest option when shingles are missing, a tree limb has punched through the roof, or wind has opened a large area. It needs to be secured without creating more holes or allowing wind to work underneath it. A loose blue tarp thrown over a roof may look like action, but it can flap itself apart, pull loose, and funnel water into the same damaged area.

    A true dry-in can be more durable than a tarp when damaged roofing has been removed and the roof deck can be covered properly. This is often the right move when repair work is scheduled but weather is moving in again. The right approach depends on the roof slope, the extent of damage, the material already on the roof, and whether the decking is still sound.

    The goal is not to make the roof look finished. The goal is to protect the wood the weather gets to first.

    When You Need Emergency Protection

    Not every storm mark calls for an emergency tarp. A few granules in a gutter or a branch in the yard does not automatically mean the roof is open. But some signs call for fast action, especially when rain is in the forecast.

    You need a prompt inspection if you see water dripping from a ceiling, wet attic insulation, missing shingles, exposed underlayment, bent or lifted metal, torn flashing around a chimney, or a limb resting on the roof. Water spots may appear far from the actual opening because it travels along rafters, decking, and insulation before it reaches the ceiling below.

    Cabins and short-term rentals need special attention after a storm. A property can sit empty for days while a small leak works through drywall, flooring, and furnishings. If you are hours away, ask for photos of the roof, the temporary protection, and any visible interior damage. Before-and-after documentation gives you a clear record of what happened and what was done, not just a verbal assurance that somebody stopped by.

    What to Do in the First 24 Hours

    Start with safety. Stay off the roof, especially if it is wet, steep, covered in debris, or has unknown structural damage. Downed power lines, loose limbs, and slick metal create risks that are not worth taking on yourself.

    From the ground, take clear photos of visible damage, fallen branches, displaced roofing, and any water entering the building. Inside, photograph wet ceilings, walls, floors, and belongings before moving items. If water is dripping, place containers beneath it and move furniture, electronics, linens, and rugs out of the area. Do not puncture a bulging ceiling unless you understand the risks and can do it safely. That ceiling may be holding a surprising amount of water.

    Then arrange a local inspection and dry-in as soon as possible. A qualified repair contractor can determine whether the water source is obvious, whether a tarp will hold, and whether the roof deck needs immediate attention. This is also the time to check gutters, valleys, chimney flashing, ridge caps, roof penetrations, and siding near the impact area. Storm damage is not always limited to the place where the branch landed.

    If you plan to file an insurance claim, document first and keep receipts for emergency protection. A dry-in is meant to prevent additional damage, not interfere with the claims process. Waiting for an adjuster while rain continues to enter the building can create a much bigger problem.

    Tarp, Dry-In, or Permanent Repair?

    There is no one-size-fits-all answer. A small area of wind-blown shingles may only need a targeted repair once conditions are dry. A torn section of metal roofing may need panels secured, fasteners corrected, and flashing rebuilt. A puncture from a tree limb may require decking repair before new roofing material goes on.

    Temporary work makes sense when weather, material availability, or insurance review prevents an immediate permanent repair. It also makes sense when the damage is extensive enough that the repair plan needs a closer look. The trade-off is that temporary protection needs monitoring. A tarp is not a permanent roof, and underlayment exposed to sun and weather has limits too.

    Permanent repair is the better next step when the damaged area is accessible, the materials are available, and the surrounding roof is in repairable shape. Repair-first work matters here. A storm does not automatically mean you need a new roof. If the damage is limited to a valley, a pipe boot, a ridge line, a chimney flashing area, or several missing shingles, a focused repair may protect the roof and your budget.

    On the other hand, an honest inspection may show that an older roof has widespread lifting, brittle shingles, soft decking, or several active leak points. That is when patching can become a short-term expense that delays a larger decision. Get a straight answer on the condition of the whole roof, not just the hole you can see.

    Roof Areas That Fail First After a Storm

    Wind does not damage every part of a roof equally. Edges, ridges, hips, valleys, and areas around vents and chimneys take a beating because they are exposed or rely on flashing and sealants to stay watertight. On metal roofs, loose fasteners, failed screws, lifted trim, and open laps can become leak paths even when the panels look mostly intact from the ground.

    For cabins in wooded areas, debris makes matters worse. Valleys full of leaves are how cabin roofs die. Leaves and limbs trap moisture, back water up under shingles, and hide damage until it reaches the deck. After a storm, a roof inspection should include the gutters and valleys, not just the obvious missing shingle or branch strike.

    Flat commercial roofs need the same urgency with different warning signs. Wind can pull at membrane edges, damage seams, open flashing at walls, or clog drains with debris. Standing water after a storm is not always a disaster, but water entering through an open seam or damaged penetration needs quick attention. EPDM, TPO, and other flat-roof systems can often be repaired when the problem is located early.

    Why Documentation Matters for Remote Owners

    When you cannot stand in the driveway and look at the roof yourself, photos are part of the repair. You should be able to see the damaged area, the protection installed, and the completed repair. Ask for wide shots that show location, close shots that show the work, and interior photos if water entered the building.

    That documentation helps with insurance, tenant communication, guest scheduling, and your own records. It also keeps a repair from becoming a vague line item months later. For a short-term rental, fast protection can prevent a canceled booking. For a landlord or property manager, it can keep a small roof issue from spreading into multiple units.

    Central Property Services approaches storm calls with that kind of practical accountability: assess the source, protect the building, explain the repair options plainly, and provide visual proof of the work. No one benefits from being pushed into a replacement before the roof has been properly examined.

    Do Not Let a Temporary Fix Become a Forgotten Fix

    A dry-in buys time. It does not erase the storm damage underneath. Once the immediate weather threat is handled, schedule the follow-up inspection and repair before the next round of rain, wind, leaves, and freeze-thaw weather finds the weak spot again.

    Keep an eye on the protected area after high winds, and check the attic or top-floor ceilings after the next rain. If a stain grows, insulation feels damp, or a musty smell appears, call for a recheck. Water damage is easier to stop at the roofline than after it has worked its way into framing and finished spaces.

    The best time to deal with storm damage is while it is still a roof problem. Get the building dry, get clear photos, and make the next repair decision with the facts in front of you.

    Roof work in motion — scaffolding, membrane, and the pace a dry-in demands
  • Emergency Roof Tarp Service After a Storm

    Emergency Roof Tarp Service After a Storm

    A windstorm does not wait until business hours, and neither does the water coming through a torn roof. Emergency roof tarp service is the fast, temporary step that keeps a bad roof situation from turning into wet insulation, stained ceilings, ruined furnishings, and damaged framing. For cabin owners and short-term rental hosts in the Red River Gorge, it can also mean the difference between a quick repair and a canceled guest stay.

    A tarp is not a roof repair. It is a controlled pause – a way to cover the damaged area, direct water away, and buy time for a proper diagnosis. Done right, it protects the structure without creating more damage. Done carelessly, a tarp can trap water, rip loose in the next gust, or leave dozens of unnecessary nail holes behind.

    When Emergency Roof Tarp Service Makes Sense

    Call for a tarp-up when the roof has an active opening or a strong chance of leaking before permanent work can be completed. That may be missing shingles after high wind, a tree limb that punched through the roof deck, exposed underlayment, storm-torn metal panels, or flashing pulled loose around a chimney, vent, or valley.

    Not every roof problem needs a tarp. A small, slow leak with no visible storm damage may need targeted leak detection instead. The source could be a failed pipe boot, an open flashing seam, backed-up gutter, or a valley full of leaves. In that case, throwing a tarp over the general area can hide the real issue without solving it.

    The question is simple: Is water getting in now, or is the roof exposed enough that the next rain will get in? If the answer is yes, temporary protection is worth doing quickly.

    For remote owners, photos matter just as much as speed. If your cabin is outside Slade, Campton, Beattyville, or another Gorge-area community and you are hours away, you need to see the damage, the protected area, and the condition of the roof after the work is finished. Before-and-after documentation gives you proof that the immediate risk was handled and helps you make a clear decision about the repair that follows.

    What a Proper Emergency Tarp-Up Should Do

    A professional tarp-up starts with a safe look at the roof, not a guess from the ground. The technician needs to identify whether the damage is limited to the surface or whether the roof deck, ridge, valleys, flashing, gutters, or nearby siding also took a hit.

    The tarp should extend well beyond the damaged spot, especially uphill. Water does not travel straight down a roof once wind pushes it sideways or it finds a low spot under damaged shingles. Covering only the visible hole may leave the water path open above it.

    The material also has to be secured with the roof in mind. Fastening methods depend on the roof type, slope, damage pattern, and weather conditions. A shingle roof, standing-seam metal roof, low-slope commercial roof, and cabin with steep sections do not get handled the same way. The goal is to keep the covering tight while limiting new penetrations and avoiding loose edges that can catch wind.

    A solid emergency roof tarp service should also include a clear report on what was found. That means photos of the damage, notes on the likely cause, and an honest recommendation about the next step. Sometimes the next step is a small repair. Sometimes a larger section needs to be rebuilt. If a full replacement is truly warranted, the evidence should make that plain. If it is not, nobody should be using a storm tarp as a sales pitch for a roof you do not need.

    What to Do Before Help Arrives

    Your first job is protecting people, not protecting shingles. Stay off the roof. Wet shingles, metal panels, mossy cabin roofs, and storm debris turn a simple climb into a serious fall risk fast. If a power line is down, a tree is tangled in electrical service, or the roof is unstable, keep clear and contact the appropriate emergency utility or public safety resource first.

    Inside the building, move furniture, electronics, rugs, and inventory away from the leak if it is safe to do so. Put containers under active drips and take a few photos or short videos of ceiling stains, dripping water, and visible exterior damage. Do not puncture a sagging ceiling bubble unless you understand what is above it and can safely control the water. A ceiling can hold far more weight than it looks like it can.

    If you own a rental cabin, notify upcoming guests early if the leak affects a sleeping area, entry, kitchen, or safety. A quick, honest message is better than hoping the ceiling stain stays small through the next storm. Property damage gets expensive. Guest complaints, refunds, and bad reviews add another layer.

    Why Waiting Costs More Than Most Owners Expect

    The visible roof damage is rarely the only damage. Water works its way into insulation, roof decking, wall cavities, and framing. It can soak drywall from the back side, where a surface stain appears days later. In a closed-up cabin, moisture may sit unnoticed until it creates odor, mildew, wood rot, or a soft spot in the ceiling.

    This is especially true after wind-driven rain. A roof can look mostly intact from the driveway while water is being pushed under lifted shingles or through damaged flashing. Metal roofs have their own trouble spots: loose fasteners, failed sealant, lifted trim, and openings around penetrations can all let water travel a long way before it shows up indoors.

    There is a trade-off, of course. Emergency dispatch and temporary protection cost money, and no one wants to pay for a tarp when a repair could happen immediately. But when weather is still moving through eastern Kentucky, materials are unavailable, or a roof needs more investigation before repairs begin, covering the opening is often the lower-cost choice. It limits the part of the property that weather can reach first.

    The Repair Comes After the Tarp

    Once conditions are safe, the temporary covering needs to lead into a real repair plan. A good inspection looks beyond the tarp line. The technician should check adjacent shingles or panels, roof decking, ridge and valley areas, chimney flashing, vents, gutters, and the interior where possible.

    The right repair may be straightforward: replace a few shingles, reseal a flashing detail, reset a metal panel, repair a pipe boot, or patch a damaged low-slope membrane. A branch strike may require replacing roof decking and framing before the roofing material goes back on. Water damage around a chimney may point to failed flashing rather than a problem with the roof field itself.

    This is where repair-first work matters. A temporary tarp creates urgency, but urgency should not erase common sense. Get a straight answer about what failed, what needs attention now, what can wait, and what the repair is expected to prevent. A contractor who documents the area and explains the options gives you something much better than a vague promise to “take care of it.”

    Storm Tarp Service for Cabins, Rentals, and Commercial Properties

    Different properties carry different risks. At a primary home, the priority may be keeping bedrooms and belongings dry. At a vacation cabin, the priority may be preventing hidden damage while the owner is out of state. At a short-term rental, fast protection can preserve a weekend booking and keep a minor roof failure from becoming a guest emergency.

    Commercial roofs require their own approach. A puncture in EPDM or TPO, a split seam, or storm damage around a rooftop penetration can put inventory, equipment, ceilings, and operations at risk. Flat roofs also hold water differently, so temporary protection has to account for ponding and drainage rather than treating the roof like a steep shingle slope.

    Central Property Services handles emergency tarp-ups with the next repair in mind. The work is documented with before-and-after photos so local owners, property managers, and people checking on a Gorge cabin from several counties away can see what happened and what was done.

    When the storm passes, do not let a tarp become a permanent plan. Use it for what it is meant to do: keep the weather out long enough to make a smart repair decision. The sooner the roof is assessed and the true entry point is fixed, the sooner your property is protected for the next hard rain.

    Roofer working on a residential roof repair
    The dry-in comes first; the paperwork photo comes with it